
Deciding to install Tailwind CSS is more than just adding another tool to your stack; it's a strategic shift toward a utility-first way of thinking. This approach completely changes how you build user interfaces, making the process faster and far more consistent. It also comes with a huge performance benefit: your final CSS bundle is tiny because Tailwind automatically purges any styles you don't actually use.
Why You Should Install Tailwind CSS
Before we dive into the setup commands, it's worth taking a moment to appreciate what makes Tailwind so effective. It’s not just another library—it's a fundamentally different approach to styling that puts speed, consistency, and long-term maintainability first.
The core idea is simple: you build complex, custom components by composing them from a constrained set of low-level utility classes. Instead of dreaming up a new className for a card component and then writing a bunch of custom CSS, you build it right in your HTML. You'd use classes like p-4, shadow-md, and rounded-lg to get the job done. This keeps you from inventing arbitrary names and one-off values, which naturally leads to a more predictable and scalable design system.
The Growth and Adoption of Tailwind
Tailwind's explosion in popularity is no accident. Its practical, real-world benefits have fueled its incredible adoption curve. By early 2025, Tailwind CSS was hitting over 20 million weekly downloads on npm, blowing past established players like Bootstrap.
But downloads only tell part of the story. The developer retention rate, which hovers in the high 70% range, is even more telling—it shows that once developers try Tailwind, they tend to stick with it for the long haul.
This infographic gives you a quick look at the metrics behind Tailwind's impressive growth in the developer community.
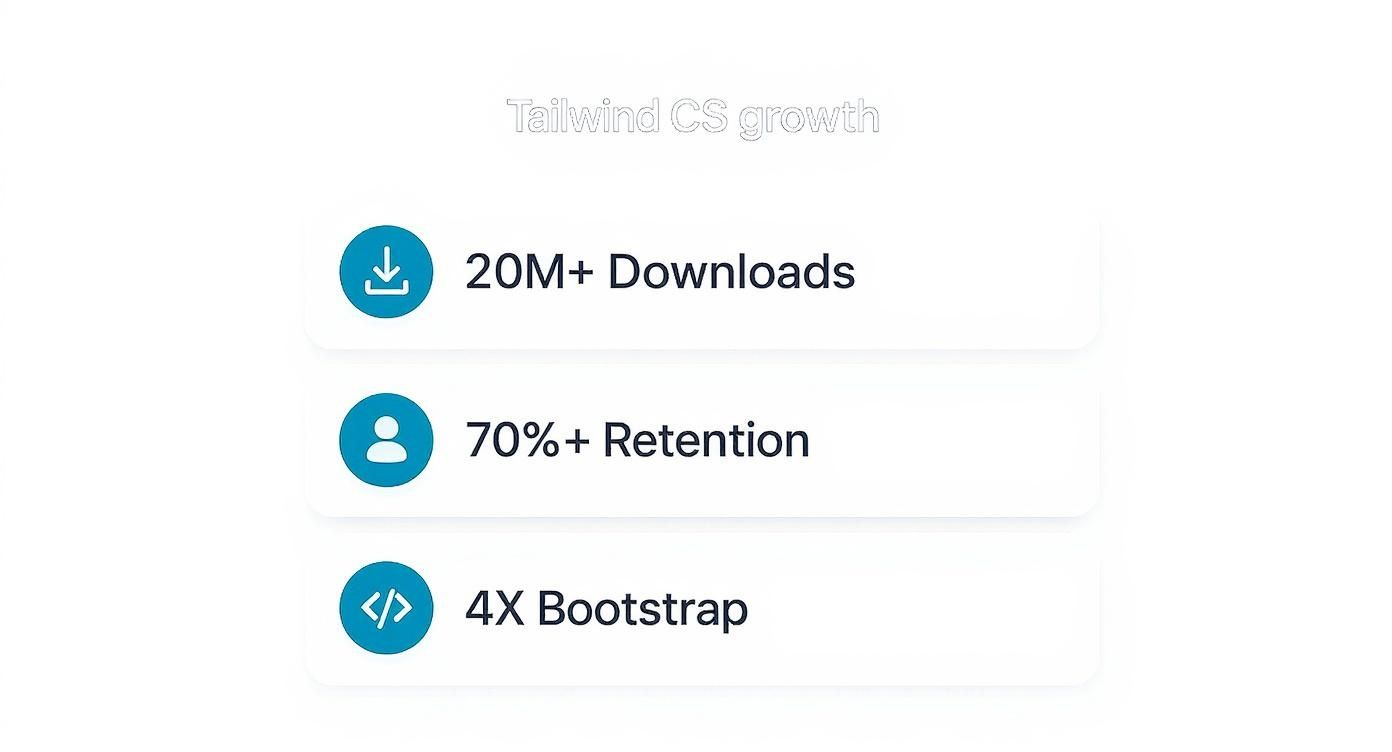
These numbers don't just point to a fad; they show genuine developer satisfaction and make a strong case for bringing it into your own projects.
When you switch to a utility-first framework, you stop fighting with CSS specificity and start spending more time actually building. Your HTML becomes the single source of truth for styling, which makes your components much easier to read, refactor, and maintain down the line.
In the ever-evolving world of front-end work, picking the right tools is critical. Understanding the landscape of the best frameworks for web development helps put Tailwind's role in context. If you're already building with components, pairing it with a Tailwind CSS component library can make you even more productive.
Setting Up Your Development Environment
Before you even think about writing a single command to install Tailwind CSS, you need to get your house in order. A properly set up development environment is the unsung hero of a smooth project, helping you sidestep those frustrating errors that can pop up right at the start. Think of it as your pre-flight check.

First things first: you absolutely need Node.js and npm (the Node Package Manager). Tailwind's powerful command-line interface (CLI) and its whole ecosystem of plugins run on the Node.js runtime. Without these two, you’re dead in the water—you can't install Tailwind or manage its dependencies.
Pop open your terminal and run these two quick commands to see if you have them installed:
node -v npm -v
If your terminal spits back version numbers (something like v20.11.0), you're all set. If you get an error, you'll need to install Node.js, which conveniently includes npm right out of the box. My advice? Always grab the latest LTS (Long-Term Support) version. It’s the sweet spot for stability and compatibility.
Structuring Your Project Folder
With the essentials installed, it's time to create a home for your project. A clean, logical folder structure is a lifesaver, especially as your project scales. You don't need anything fancy to begin with.
For a simple project, I usually start with a structure like this:
- /public: This is where your public-facing files will go. Think
index.htmland, most importantly, the final compiledoutput.cssfile. - /src: This is your workshop. It holds all your source files, including the
input.csswhere you'll be adding Tailwind's directives.
This separation is more than just good housekeeping; it's a critical practice. It draws a clear line between the files you work on and the optimized, production-ready files served to your users. The input.css is for you, the developer. The output.css is the final build artifact for the browser.
A clean separation between source (
src) and distribution (publicordist) folders isn't just a best practice—it's essential for automating your build process. It tells your tools exactly what to process and where to place the final output, preventing messy and unpredictable builds.
Installing Tailwind CSS with the CLI
When you're ready to get serious with Tailwind CSS, the CLI is the way to go. It's the most direct and flexible method, giving you total control over the build process. This hands-on approach is perfect for understanding how Tailwind works under the hood, and it scales from a single HTML file to a massive JavaScript application.
First things first, let's get Tailwind and its essential companions into your project. Pop open your terminal in the project's root folder and run this:
npm install -D tailwindcss postcss autoprefixer
This single command pulls in three crucial development dependencies:
- tailwindcss: This is the core engine—the tool that scans your files and builds your CSS.
- postcss: A powerful tool that transforms CSS with JavaScript. Tailwind is actually a PostCSS plugin itself.
- autoprefixer: This handy PostCSS plugin automatically adds vendor prefixes to your CSS, saving you the headache of ensuring cross-browser compatibility.
With the packages installed, the next step is to generate your configuration files. Think of these as the brains of your Tailwind setup.
npx tailwindcss init -p
Running that command magically creates two files in your project:
- tailwind.config.js: This is your command center for customization. Here you'll define your unique color palette, tweak spacing, set up fonts, and much more.
- postcss.config.js: This file is pre-configured to tell PostCSS to use Tailwind and Autoprefixer. You usually don't need to touch this one.
Configuring Your Template Paths
Alright, this next part is the most critical step of the entire process. Seriously. If you get this wrong, Tailwind will generate an empty CSS file, and you'll be left scratching your head. You need to tell Tailwind where to look for your className names.
Open up your tailwind.config.js file and find the content array. You need to add paths to every single file that might contain a Tailwind class—HTML files, JavaScript components, you name it.
/** @type {import('tailwindcss').Config} \*/
export default {
content: ["./public/**/_.html", "./src/\*\*/_.{js,jsx,ts,tsx,vue}"],
theme: {
extend: {},
},
plugins: [],
}This example uses "glob patterns" to find any .html files in the public folder and a variety of component files inside src. Make sure you adjust these paths to match your project's actual folder structure.
Setting Up Your Source CSS
Now that Tailwind knows where to look, you need to give it an entry point—a source CSS file where it can inject its core styles.
Go into your src folder (or wherever you keep your source code) and create a file. Let's call it input.css. Inside this new file, add these three special @tailwind directives.
@tailwind base; @tailwind components; @tailwind utilities;
These aren't standard CSS; they're special instructions for Tailwind.
baseinjects helpful browser resets,componentshandles component-level classes, andutilitiesis the magic that brings in all the utility classes likep-4andflex.
While the CLI is fantastic for production builds, it's not the only way to use Tailwind. If you're just prototyping or learning, a simpler setup might be better. To see a lighter-weight approach, check out our guide on using the Tailwind CDN with plain HTML.
Running the Build Process
We're in the home stretch! With everything configured, the final step is to kick off the CLI build process. This command will take your input.css, scan your template files, and compile a final, optimized stylesheet.
npx tailwindcss -i ./src/input.css -o ./public/output.css --watch
Let's quickly break down what's happening here:
- -i ./src/input.css: The input flag points to your source CSS file.
- -o ./public/output.css: The output flag defines where the final, compiled CSS file should be saved.
- --watch: This little flag is a lifesaver during development. It tells the CLI to continuously watch your files for changes and automatically rebuild your CSS anytime you save.
Once that's running, all you have to do is link to the output.css file in your main index.html. Go ahead and add a few Tailwind classes to your HTML, and watch them spring to life in the browser.
Framework-Specific Installation Guides
While the Tailwind CLI gives you a universal way to get started, the truth is, most of us are building within a specific JavaScript framework. Every environment, whether it's React, Next.js, or Vue, has its own unique build tools and project structure.
This means that getting Tailwind up and running often requires a few framework-specific tweaks. Nailing these details from the get-go will save you a ton of headaches and debugging time down the line.
This guide will walk you through the most efficient way to integrate Tailwind with the most popular frameworks out there. We'll cover everything from installing dependencies to tweaking the necessary config files. The goal is simple: get you up and running fast, no matter your tech stack.
If you're still deciding on a framework, it can be helpful to see a comparison of how to choose between popular JavaScript frameworks like React and Angular to figure out what best fits your project's goals.
The initial installation commands for each framework are quite similar, which simplifies the process. Here’s a quick look at what you can expect.
Framework Installation Command Comparison
| Framework | Primary Installation Command |
|---|---|
| React + Vite | npm install -D tailwindcss postcss autoprefixer |
| Next.js | npm install -D tailwindcss postcss autoprefixer |
| Vue.js | npm install -D tailwindcss postcss autoprefixer |
As you can see, the core dependencies are identical across the board. The real differences pop up in the configuration files, which we'll dive into now.
Installing Tailwind In A React And Vite Project
Vite has quickly become a developer favorite for bootstrapping React apps, mostly thanks to its incredible speed. Luckily, integrating Tailwind into a Vite-powered React project is a clean, straightforward process.
You'll start by installing Tailwind and its peer dependencies, then generate the config files. These commands are the exact same ones you'd use in a standard CLI setup.
npm install -D tailwindcss postcss autoprefixer npx tailwindcss init -p
The real key is modifying your tailwind.config.js. You need to point the content array to your JSX and TSX files so Tailwind’s JIT compiler knows where to look for utility classes.
// tailwind.config.js
/** @type {import('tailwindcss').Config} \*/
export default {
content: ["./index.html", "./src/**/\*.{js,ts,jsx,tsx}"],
theme: {
extend: {},
},
plugins: [],
}Lastly, create a main CSS file (something like src/index.css) and drop in the three core Tailwind directives. Just make sure to import this CSS file at the very top of your main entry point, which is usually src/main.jsx.
For a more detailed walkthrough, check out our guide on how to install Tailwind CSS in a React project.
Setting Up With Next.js
Next.js is another perfect match for Tailwind, especially with its file-based routing and server-side rendering. The best part? The official create-next-app CLI gives you a built-in option to include Tailwind from the very beginning. This is, by far, the easiest way to do it.
But if you're adding Tailwind to an existing Next.js project, the process is nearly identical to the Vite setup. You'll install the same dependencies and generate the config files.
The only significant difference is the content path in tailwind.config.js. You’ll want to configure it to scan the pages, components, and app directories commonly found in Next.js apps.
// tailwind.config.js
/** @type {import('tailwindcss').Config} \*/
module.exports = {
content: [
"./pages/**/_.{js,ts,jsx,tsx,mdx}",
"./components/\*\*/_.{js,ts,jsx,tsx,mdx}",
"./app/\*_/_.{js,ts,jsx,tsx,mdx}",
],
theme: {
extend: {},
},
plugins: [],
}Once that's configured, just add the @tailwind directives to your globals.css file and make sure it’s imported in your _app.js or layout.js file.
Pro Tip: When using Tailwind with component-based frameworks, treat your utility classes like a local styling API. Instead of creating separate CSS files for each component, apply styles directly in the markup. This makes your components self-contained and much easier to move around or reuse.
Integrating With Vue.js
For all the Vue.js developers out there, the process is just as smooth. After running the standard installation and initialization commands, your focus will again be on the tailwind.config.js file.
The goal is to make sure it's scanning all your .vue files, along with any other HTML or JavaScript files in your project. A typical configuration for a Vue project will look something like this:
- Content Path:
'./index.html' - Component Path:
'./src/**/*.{vue,js,ts,jsx,tsx}'
With that set up, add the @tailwind directives to your main CSS entry point (often found at src/assets/main.css) and import that file into src/main.js. This makes Tailwind's styles available globally to all of your single-file components.
As you can see, the core pattern is consistent across frameworks. The only thing that really changes is telling Tailwind which files to watch.
Customizing Your Tailwind Configuration
Getting Tailwind installed is really just the first step. The real power, the thing that turns Tailwind from a generic utility library into your design system, lives inside the tailwind.config.js file. This is where the magic happens.
Think of the default theme as a fantastic starting point—a solid foundation. But your project has its own identity. It has a unique color palette, specific fonts, and a precise spacing scale that makes your brand recognizable. By tweaking your configuration file, you're essentially teaching Tailwind about these custom design tokens. Once you do, they become available as utility classes you can use anywhere.
Extending The Default Theme
You don't have to throw the baby out with the bathwater. The theme.extend object is your best friend for adding your own flavor while keeping Tailwind's excellent defaults intact. This is the way to go when you just need to augment the existing system, not completely replace it.
For instance, here’s how you might add a couple of custom brand colors and a new display font:
// tailwind.config.js
module.exports = {
theme: {
extend: {
colors: {
"brand-primary": "#0A74DA",
"brand-secondary": "#F6C90E",
},
fontFamily: {
sans: ["Inter", "sans-serif"],
display: ["Poppins", "sans-serif"],
},
},
},
plugins: [],
}Just like that, you can start using classes like bg-brand-primary or font-display right in your markup. This is how you enforce consistency and stick to your design specs, which is a huge step up from a basic installation.
The ability to extend the theme is what makes Tailwind so scalable. You can start with the defaults for rapid prototyping and then gradually introduce custom tokens as your design system matures, all without breaking your existing work.
Using Plugins For New Utilities
Sooner or later, you'll run into a situation where you need utilities that aren't part of the core framework. That's what plugins are for. Tailwind CSS has a rich ecosystem of official and community-built plugins that bolt on new capabilities with minimal fuss.
A classic example is the official typography plugin. It's a lifesaver for styling blocks of prose—think blog posts or articles—with beautiful, sensible defaults. Getting it set up is a breeze.
First, you'll need to install the package:
npm install -D @tailwindcss/typography
Then, just require it inside the plugins array in your config file.
// tailwind.config.js
module.exports = {
// ...
plugins: [require("@tailwindcss/typography")],
}Now, just by adding a single prose className to any container of raw HTML, it will be beautifully styled from top to bottom. This modular approach is great because it keeps your main configuration file clean and makes it simple to add or remove features as your project's needs change.
Common Tailwind Installation Questions
Even with a perfect setup, installing Tailwind CSS can sometimes throw you a curveball. We've all been there: a small typo in a config file or a slight misunderstanding of the build process can lead to moments of pure frustration. Let's dig into some of the most common issues developers run into so you can get back to building.

Why Are My Custom Styles Not Showing Up?
This is easily the number one problem people face. You’ve added a bunch of classes to your HTML, you hit save, you refresh the page, and... nothing. Crickets.
Nine times out of ten, the culprit is the content array in your tailwind.config.js file.
This little array is a big deal—it tells Tailwind's JIT (Just-In-Time) compiler exactly which files to scan for class names. If your file paths are wrong or you've forgotten to add a new folder, Tailwind simply won't "see" the utility classes you're trying to use. The result? It doesn't generate the CSS for them.
The fix is usually simple:
- Double-check your glob patterns. Make sure they accurately point to all your template files (HTML, JSX, Vue, Svelte, etc.).
- Restart your build process after saving the config file. This ensures the compiler picks up the new paths.
If your paths are definitely correct and styles are still missing, here are a few other things to check:
- Is Your Build Process Running? Take a peek at your terminal. Is the CLI command with the
--watchflag still active? If not, Tailwind isn't watching for your changes and won't recompile your CSS. - Could It Be Your Browser Cache? Browsers love to hang onto old stylesheets. A hard refresh (Ctrl+Shift+R on Windows or Cmd+Shift+R on Mac) forces it to grab the latest version and often solves the problem instantly.
- Did You Import the CSS File Correctly? Make sure your main CSS file—the one with the
@tailwinddirectives—is properly imported into your project's entry point, likemain.jsxin a React app or your root layout file.
How Do I Add Tailwind to an Existing Project?
Dropping Tailwind into a project that already has a bunch of custom CSS can feel a bit like performing surgery. You want to add the new stuff without breaking everything that already works. The installation process itself is the same, but you need a smart integration strategy.
The best way I've found to do this is to start small. Use Tailwind for new components only, leaving your old stylesheets and components as they are for now. Over time, as you touch different parts of the app, you can refactor existing components to use Tailwind utilities.
This "phased approach" lets you adopt Tailwind gradually without the pressure of a massive, all-at-once rewrite. It makes the transition much more manageable.
A key tip for this process is to prevent Tailwind's base styles (called Preflight) from clashing with your existing CSS. You can easily disable them by adding
preflight: falseto thecorePluginsobject in yourtailwind.config.jsfile. This gives you way more control.
Ready to build stunning, production-ready interfaces without the hassle? Magic UI offers a massive library of over 150 free and premium components built with React, Typescript, and Tailwind CSS. Accelerate your development and create beautiful landing pages in minutes. Explore Components on Magic UI.