
At its core, a Next JS layout is just a React component that wraps around your pages. Think of it as a persistent UI shell—things like headers, footers, or sidebars—that doesn't disappear when you navigate from one page to another. It's a foundational feature of the Next.js App Router that lets you define a common structure once and reuse it across an entire section of your site, cutting down on repetitive code and keeping your component state intact.
Why Next JS Layouts Are a Game Changer
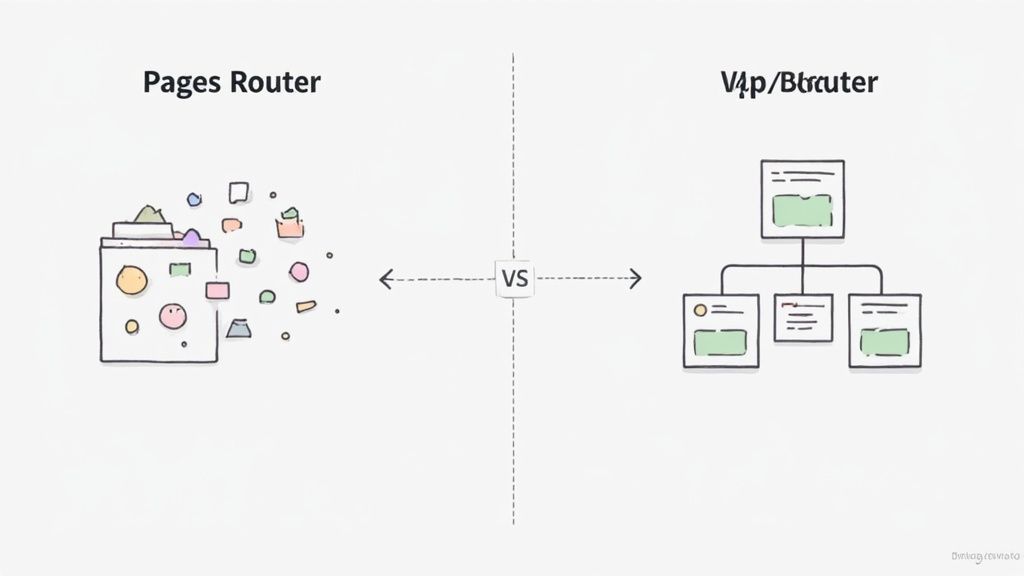
The arrival of the App Router in Next.js really changed how we build web apps. It was a massive pivot from the old, page-focused model of the Pages Router to a more modern, component-driven architecture. This wasn't just some small tweak; it was a total reimagining of routing, rendering, and even how we fetch data.
The layout.js file convention sits right at the heart of this new approach. You no longer have to manually import and wrap every single page component with a shared <Layout> component. Instead, you just drop a layout.js file into a directory, and it automatically wraps every page and sub-folder within it. This simple idea has profound effects on how you structure and scale your projects.
From Manual Wrappers to Automatic Shells
I remember the old days with the Pages Router. If you wanted a consistent UI, you had to import your layout component and wrap your page content with it... on every. single. page. It worked, sure, but it was tedious and inefficient. For a dashboard with dozens of pages, that meant dozens of files with the same boilerplate code.
The App Router makes this so much cleaner. When you place a layout.js file in a folder, you're essentially creating a UI "shell" that sticks around. So, when a user moves from /dashboard to /dashboard/settings, the shared layout—maybe a sidebar and header—doesn't have to re-render. Only the actual page content swaps out.
This shift brings a few huge wins right away:
- State Preservation: Because the layout component doesn't get unmounted during navigation, its state is preserved. That search query in your sidebar input? It stays right where it is.
- Performance Gains: Shared components and assets inside the layout are only downloaded once. This smart deduplication drastically cuts down on the data being sent over the wire as users click around your site.
- Simplified Codebase: It completely gets rid of the need for all those redundant wrapper components. Your project becomes cleaner and way easier to manage. You define the shared UI in one spot, and Next.js does all the heavy lifting.
The Power of Nested Layouts
The true magic of the Next JS layout system really clicks when you start nesting them. You can have a root layout in your app directory that defines the global <html> and <body> tags, a site-wide navigation bar, and maybe a footer. Then, inside a /dashboard folder, you can add another layout.js that introduces a sidebar specific only to the dashboard section.
This nested structure just makes sense. The dashboard's layout automatically wraps its own child pages while still being wrapped by the main root layout. You get this layered, super-organized UI without any complicated setup.
In this guide, I'll walk you through everything you need to master this system. We'll start by setting up your foundational root layout, then dive into creating more complex UIs with nested layouts, and finally, look at how to optimize it all for top-notch performance and SEO.
Creating Your Foundational Root Layout
Alright, let's move from theory to actually building something. The first real step in using the App Router is setting up your root layout. This is a special file, app/layout.js, that acts as the main server component for your entire application. It’s what renders the initial HTML document that gets sent to the browser.
Think of it as the foundational blueprint for your whole site. Every single page and every nested layout you create will live inside this one component. It’s where you define the universal structure—the <html> and <body> tags—that’s shared across every route. Getting this right from the start is key to keeping your app consistent and building a solid base for everything else.
The Anatomy of a Root Layout
At its heart, app/layout.js is just a React Server Component. Its one non-negotiable job is to accept and render a children prop. This prop is a placeholder for whatever child layout or page is currently active for a given route. When a user clicks a link, Next.js smartly swaps out the children without unmounting the root layout itself, preserving its state.
This file is the perfect spot for handling anything that needs to be global. Typically, you'll see the root layout taking care of a few common tasks:
- Importing Global Styles: This is where you pull in your main stylesheet, like
globals.css, to make sure your styles are applied everywhere. - Defining Metadata: You can export a
metadataobject right from this file to set default SEO tags for your site's title and description. - Structuring the Document: It's required to include the
<html>and<body>tags here to create a valid HTML structure.
This centralized setup is a huge improvement over older ways of doing things. The numbers back it up, too. A recent State of JavaScript Survey found that 68% of developers preferred Next.js for production apps, putting it way ahead of other frameworks. This widespread adoption is largely thanks to its powerful, SEO-friendly layout system that just works. For a deeper dive, check out this Next.js framework comparison on staticmania.com.
A Practical Root Layout Example
Let's put together a root layout you could actually use in a project. This one will include global styles, a shared navigation bar and footer, and the metadata configuration for site-wide SEO.
First, go ahead and create the file app/layout.js:
import { Inter } from "next/font/google"
import "./globals.css"
import Footer from "@/components/Footer"
import Header from "@/components/Header"
const inter = Inter({ subsets: ["latin"] })
export const metadata = {
title: "Magic UI - Stunning Landing Pages",
description: "Build beautiful web interfaces in minutes with Magic UI.",
}
export default function RootLayout({ children }) {
return (
<html lang="en">
<body className={inter.className}>
<Header />
<main>{children}</main>
<Footer />
</body>
</html>
)
}In this snippet, we're importing and applying the Inter font from next/font, which is great for performance. We're also bringing in our Header and Footer components. Now, they'll show up on every single page of the app automatically—no need to import them anywhere else. If you want to see how to build a component like that, check out our guide on creating a React JS Navbar.
Key Takeaway: The root
next js layoutis more than a simple container. It's the single source of truth for your app's global UI and metadata. By putting components like headers and footers here, you ensure they're always present, while thechildrenprop dynamically renders the active page.
This structure is also incredibly efficient. The Header and Footer components will only render on the initial load. They won't re-render as users navigate between pages, which preserves their state and saves the browser from doing unnecessary work. The result is a much faster, smoother user experience—a core benefit of the Next.js App Router. With this foundation in place, you're ready to start building out the rest of your UI.
Building Complex UIs with Nested Layouts
A single root layout is a great start, but the real power of the Next JS layout system comes alive when you start nesting them. This is how you level up from a simple site to a complex application with different UI sections.
Think about a common scenario: building a web app that has both a public-facing marketing site and a private user dashboard. These two areas need entirely different looks. The marketing pages probably want a big, eye-catching header, while the dashboard needs a persistent sidebar for navigation and user controls.
This is exactly what nested layouts were made for.
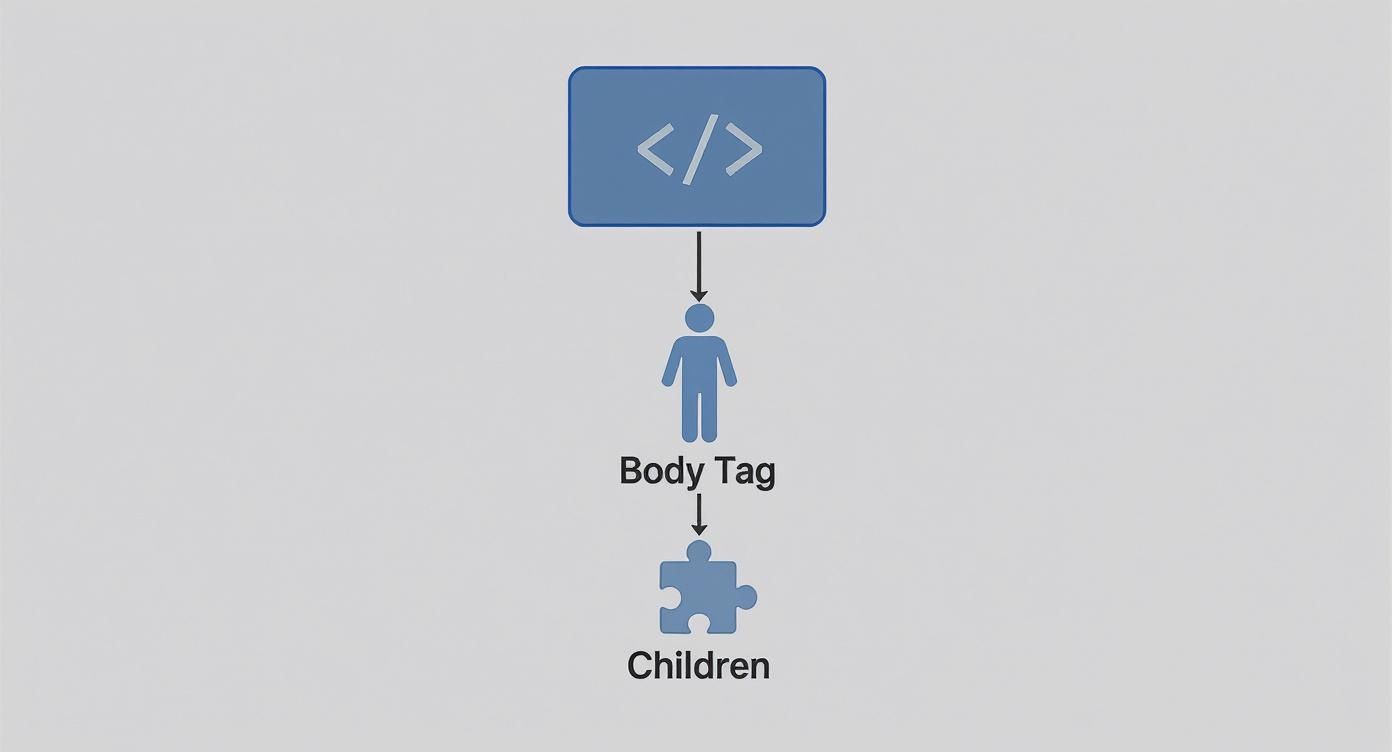
This diagram shows how the root layout sets up the basic HTML and Body tags that wrap everything else. Nested layouts just add more layers inside, wrapping the children prop with extra UI specific to that part of your site.
Creating a Segment-Specific Layout
Let's actually build that user dashboard. To create a layout that only applies to the dashboard section, you just need to create a new dashboard folder inside your app directory and drop a layout.js file in there.
The file structure would look like this:
app/layout.js(Root layout with global nav/footer)page.js(Your homepage)dashboard/layout.js(Dashboard-specific layout with a sidebar)page.js(Dashboard's main page)settings/page.js(Dashboard settings page)
Now, any page inside the dashboard folder—like /dashboard or /dashboard/settings—will automatically be wrapped by both the root layout and the new dashboard layout. The components just compose together, no extra work needed.
Here’s a quick, practical example for app/dashboard/layout.js:
import DashboardSidebar from "@/components/DashboardSidebar"
export default function DashboardLayout({ children }) {
return (
<section className="flex">
<DashboardSidebar />
<div className="flex-grow p-8">{children}</div>
</section>
)
}With this in place, the DashboardSidebar shows up on every single dashboard page but stays completely out of your homepage or any other public routes. It’s a clean and powerful way to segment your UI logic.
Organizing Routes without Affecting URLs
Sometimes, you need to group pages under different layouts without actually changing their URLs. For example, maybe you want your marketing pages (/, /about, /pricing) and your app pages (/login, /signup) to have completely different UI shells, but they all live at the root of your domain.
This is where Route Groups come in handy. By wrapping a folder name in parentheses, like (marketing), you're telling Next.js that this folder is just for organization—it won't become part of the final URL.
Key Takeaway: Route Groups are a fantastic architectural tool for partitioning your app into sections with unique layouts while keeping your URLs clean. It’s a must-know for managing complex projects.
Let's apply this to our example. We could structure the app like so:
app/(marketing)/layout.js(Marketing layout with a big header)page.js(Renders at/)about/page.js(Renders at/about)
(app)/layout.js(App layout with a simple, clean UI)login/page.js(Renders at/login)signup/page.js(Renders at/signup)
layout.js(The main root layout)
With this setup, /about gets the marketing layout and /login gets the app layout. Both still inherit from the root layout, but their intermediate shells are completely different. This setup is perfect for preventing UI from one section from ever bleeding into another.
Deciding on the right layout strategy can be tricky. Here’s a quick reference to help you choose the best approach for different scenarios in your Next.js project.
Layout Strategies and When to Use Them
| Layout Type | Directory Structure | Primary Use Case | Key Benefit |
|---|---|---|---|
| Root Layout | app/layout.js | Applying global UI like navigation, footers, and providers to the entire application. | Ensures a consistent shell for every page and is the ideal place for context providers. |
| Nested Layout | app/dashboard/layout.js | Creating a specific UI for a segment of your app, like a user dashboard or admin panel. | UI is automatically applied to all child routes, preserving state and avoiding re-renders on navigation. |
| Route Group Layout | app/(marketing)/layout.js | Grouping pages with a shared layout without affecting the URL structure. | Organizes your project logically while keeping URLs clean and user-friendly. |
| Multiple Root Layouts | app/(group1)/layout.js app/(group2)/layout.js | For completely separate sections of an app, like a marketing site and a web app, that don't share any UI. | Total UI separation; each section has its own <html> and <body> tags. |
This table should give you a clear starting point for structuring your layouts effectively, whether you're building a simple blog or a large-scale web application.
The Performance and State Preservation Win
Honestly, one of the biggest wins with nested layouts is how they handle state and rendering. When a user clicks a link to navigate between pages that share a layout (say, from /dashboard to /dashboard/settings), the shared layout component does not re-render.
This is a huge deal for two reasons:
- State is Preserved: Any React state you have in the layout—like a search query in a sidebar or the scroll position of a nav panel—stays right where it is. The user experience feels incredibly fluid and natural.
- Performance is Improved: Since the layout and its child components aren't being torn down and rebuilt, the browser does way less work. Any shared data fetched within the layout isn't re-fetched, and the DOM isn't needlessly updated, leading to noticeably faster page transitions.
Enhancing Layouts with Interactive Components

A solid Next.js layout does more than just organize your UI—it’s the foundation for a truly dynamic and engaging experience. Once you’ve got your basic nested layouts in place, the real fun begins: bringing them to life with interactive elements. This is where you transform a static structure into a modern, lively interface that grabs a user's attention.
Jumping straight into pre-built component libraries is one of the most efficient ways I've found to add visual flair without reinventing the wheel. Libraries like Magic UI are packed with animated and interactive components that you can drop right into your layouts for a polished, professional feel in minutes.
Installing and Integrating a UI Library
Let's get our hands dirty and add some magic to our layout. I’ll walk you through installing a component from the Magic UI library. For this example, we'll use an animated grid pattern to add a subtle, professional background to our root layout.
First things first, you need to add the component to your project. Pop open your terminal and run the installation command:
npm i @magic-ui/react-animated-grid-patternWith the component installed, you can import it directly into your app/layout.js file. The goal here is to wrap the main content area of the entire site with this new visual element. It's a perfect example of how layouts become a central hub for site-wide design decisions.
The recent growth of Next.js has been remarkable, highlighting its importance in modern web development. Much of this surge comes from its powerful ability to handle complex layouts and hybrid rendering, which strikes a great balance between fast load times and dynamic content. The App Router, in particular, has made organizing code a breeze with file-based routing and nested layouts, cutting down on redundant code significantly. You can learn more about the advantages of using Next.js on aalpha.net.
Wrapping Layout Children with an Animated Component
Okay, let's modify our RootLayout to actually use the AnimatedGridPattern. We'll place it inside the <body> tag so it acts as a background for the entire application, sitting neatly behind the Header, Footer, and the main children content.
Here’s what your updated app/layout.js file might look like:
import { Inter } from "next/font/google"
import "./globals.css"
import { cn } from "@/lib/utils" // A utility for merging class names
import Footer from "@/components/Footer"
import Header from "@/components/Header"
import { AnimatedGridPattern } from "@/components/magicui/animated-grid-pattern" // Assuming you place it here
const inter = Inter({ subsets: ["latin"] })
export default function RootLayout({ children }) {
return (
<html lang="en">
<body className={inter.className}>
<div className="relative flex min-h-screen w-full flex-col items-center justify-center">
<AnimatedGridPattern
numSquares={30}
maxOpacity={0.5}
duration={3}
repeatDelay={1}
className={cn(
"[mask-image:radial-gradient(ellipse_at_center,white,transparent_75%)]",
"inset-x-0 inset-y-[-30%] h-[200%] skew-y-12"
)}
/>
<Header />
<main className="z-10 w-full">{children}</main>
<Footer />
</div>
</body>
</html>
)
}Notice how we've wrapped our page structure in a relative container and positioned the AnimatedGridPattern inside it. By adding z-10 to the <main> element, we make sure our actual page content always sits on top of the animated background. It's a simple CSS trick that saves a lot of headaches.
Pro Tip: When you're integrating background components, always use a relative parent container and
z-indexto manage the layering of your UI. This is a lifesaver for preventing the background from covering up clickable elements like buttons and links.
Adding an Interactive Navigation Component
Let's push this a bit further. Say you want to add an interactive navigation element, like Magic UI's <Dock> component, but only to a specific part of your app. This is a fantastic use case for a nested layout, like one for a user dashboard. You could add a sleek, macOS-style dock to your app/dashboard/layout.js in just a few steps.
The process is exactly the same:
- Install the component:
npm i @magic-ui/react-dock - Import it:
import { Dock, DockIcon } from "@/components/magicui/dock"; - Integrate it: Place the
<Dock>component inside yourDashboardLayout, maybe fixing it to the bottom of the screen to give your users an intuitive way to navigate.
This modular approach is what makes the Next.js layout system so powerful. You can build up complex, interactive UIs by adding specialized components exactly where they’re needed, without bloating your global layout. If you want more ideas for cool UI enhancements, you should check out how to build an interactive hover button.
Optimizing Your Layout for SEO and Performance
A solid Next.js layout does more than just organize your UI. It's the bedrock for building apps that are both incredibly fast and friendly to search engines. If you get performance and SEO right at the layout level, every page you build on top of it inherits that strong foundation.
This goes way beyond just writing clean code. It's about being smart with how you fetch data, how you manage your metadata, and how you understand Next.js's asset handling to create a snappy user experience. Let's dig into the essential optimizations every developer should have in their toolkit.
Mastering Metadata for Better SEO
One of the slickest features in the App Router is the built-in Metadata API. This lets you define all the SEO-critical info—titles, descriptions, Open Graph tags—right inside your layout.js and page.js files.
For site-wide defaults, you can just export a static metadata object from your root layout. It's that simple.
// in app/layout.js
export const metadata = {
title: "Magic UI - Stunning Landing Pages",
description: "Build beautiful web interfaces in minutes with Magic UI.",
openGraph: {
images: ["/og-image.png"],
},
}That's a great starting point, but the real magic happens with dynamic metadata. Since layouts are Server Components, they can fetch data and use it to cook up unique metadata for each route. For example, a layout for a product category page could fetch the category's name to craft a perfectly tailored title.
// in app/products/[category]/layout.js
async function getCategory(slug) {
const res = await fetch(`https://api.example.com/categories/${slug}`)
return res.json()
}
export async function generateMetadata({ params }) {
const category = await getCategory(params.category)
return {
title: `Shop ${category.name} Products`,
description: `Explore our collection of ${category.name}.`,
}
}With this approach, every page is perfectly tuned for search engines, serving up relevant, specific content in its tags. If you want to dive deeper into the principles of improving your site’s visibility, check out a complete guide to Search Engine Optimization.
Leveraging Server Components and Caching
Layouts are Server Components by default, and that’s a huge win for performance. They render on the server, sending fully-formed HTML to the browser with zero client-side JavaScript needed just to render the layout structure.
This immediately slashes your initial bundle size, which translates directly to faster load times. You can even fetch data right inside a layout without worrying about shipping data-fetching libraries to the client. Next.js handles it all, caching the data to prevent unnecessary requests.
Here are a few practical tips to squeeze out more performance:
- Fetch Data High in the Tree: Grab shared data, like user session details or main navigation items, in the highest-level layout that needs it. This data gets fetched once and can be passed down or accessed via context.
- Keep Layouts Static When You Can: If a layout doesn't rely on dynamic data, Next.js can render it statically at build time, making it lightning-fast.
- Embrace Next.js Caching: The framework's built-in
fetchcaching is your friend. Next.js automatically cachesfetchrequests, and you can control how data is revalidated, either based on time or on-demand usingrevalidateTag.
The Power of Layout Deduplication
One of the unsung heroes of Next.js performance is layout deduplication. When a user navigates between pages that share a layout, Next.js is smart. It only downloads the code and assets for that layout once.
Think about it: if you have a product grid with 50 links, and each one goes to a detail page using the same layout, the browser isn't going to re-download that layout 50 times. It fetches it on the first click and reuses it for every subsequent navigation. This is a game-changer for reducing network traffic and making page transitions feel instant.
By preventing redundant asset fetching and leveraging server-side rendering, Next.js layouts directly improve Core Web Vitals like Largest Contentful Paint (LCP) and First Input Delay (FID), which are major factors in SEO ranking.
This intelligent asset handling is a core reason why apps built with the App Router feel so responsive. It all happens automatically, giving you a performant application right out of the box. For those who want to get even more out of their optimizations, you might find our guide on how to improve website performance useful. Pairing these layout strategies with broader web performance principles will make your site fly for users and climb the ranks on search engines.
Common Questions About Next.js Layouts
The App Router is incredibly powerful, but as with any new system, a few common questions tend to pop up. When developers start digging into Next.js layouts, they often run into the same handful of challenges. Let's walk through them so you can get past the hurdles and back to building.
How Do I Apply a Layout to a Specific Group of Pages?
This is a classic use case, and the answer is Route Groups. It's a simple but brilliant convention.
You just create a folder with its name wrapped in parentheses, like (dashboard). Inside that folder, you can drop a layout.js file. That layout will then wrap every route inside that group—think /dashboard/settings or /dashboard/profile—but the (dashboard) part never shows up in the URL.
It’s the perfect way to create distinct sections in your app. You could have one for your public marketing pages and another for your authenticated user area, each with its own UI shell, all while keeping your URLs clean and logical.
Can I Fetch Data Directly in a Layout?
Yes, you can, and for shared data, you absolutely should. Layouts in the App Router are Server Components by default. This means you can use async/await to fetch data right inside the layout file itself. It’s a game-changer for things like grabbing a user's session data or fetching the navigation links that need to be on every page.
Here's the key takeaway: layouts don't re-fetch data when you navigate between their child pages. That makes them incredibly efficient for data that's consistent across an entire section of your site, cutting down on unnecessary network requests and making your app feel faster.
What Is the Difference Between a Layout and a Template?
This one trips a lot of people up because the difference is subtle but crucial.
- Layouts (
layout.js) are built for persistence. They preserve state and don't re-render when you move between child pages. This is exactly what you want for a sidebar, a header, or a music player that needs to keep playing as the user navigates. - Templates (
template.js), on the other hand, create a new instance of their children on every single navigation. State gets completely wiped. You'd reach for a template when you specifically need to re-run effects (likeuseEffectfor page-view tracking) or reset component state (useState) every time a user hits a new page in that segment.
How Do I Pass Data From a Layout to a Page?
You can't just pass props down from a layout to a page component like you would with normal React components; the architecture just isn't designed for that. Instead, you have two great options. The first is to just fetch the same data in both places—Next.js is smart enough to automatically deduplicate identical fetch requests, so there's no performance penalty.
The cleaner and more common pattern, however, is to use React Context. You can set up a Context Provider inside your layout and wrap the children prop with it. This makes the data available to any nested component or page down the tree, giving you a clean, scalable way to share state.
Ready to build stunning, high-performance web interfaces without the headache? Magic UI offers over 150 free and open-source animated components, plus powerful pro templates to help you create beautiful landing pages in minutes. Check out the full library and start building at https://magicui.design.