
A good Next.js website template is more than just a pre-built layout; it's a production-ready foundation for your entire project. It lets you skip all the tedious, time-consuming setup and jump straight into building the features that actually matter. Think of it as getting a massive head start, with optimized configurations for performance and SEO already baked in.
Why Smart Developers Start with a Next.js Template
We've all been there: staring at a blank terminal after typing git init. While building from the ground up gives you absolute control, it also means you're reinventing the wheel on core configurations every single time. This is where a quality Next.js template offers a serious strategic edge. It’s not just about saving time—it’s about gaining tangible, long-term benefits.
The biggest win is inheriting a codebase that's already been battle-tested. Instead of spending hours, or even days, wrestling with boilerplate for routing, state management, or getting TypeScript to play nice, you start with a solid, pre-configured structure. That foundational work is critical, but let's be honest, it adds zero direct value to your users. A template handles it all for you.
Accelerate Development and Focus on Value
By starting with a template, you immediately shift your focus from setup to execution. You can get to work on the unique features that define your product from day one, whether that's a slick e-commerce checkout flow or a complex SaaS dashboard. This isn't just about moving faster; it's about investing your most valuable resource—your development time—where it has the most impact.
To really get it, you can look at the classic debate of a custom website vs. template website. While a fully custom build has its place, templates provide a powerful middle ground, giving you structure without handcuffing your ability to customize.
Inherit Performance and SEO Best Practices
A well-crafted Next.js website template comes pre-optimized for crucial metrics like Core Web Vitals and search engine visibility. This means you’re not just getting a few components; you're getting a performance-first architecture right out of the gate.
A great template bakes in best practices for image optimization, code splitting, and metadata handling, ensuring your site is fast and SEO-friendly out of the box. This saves countless hours of post-launch tuning and optimization.
This built-in quality is a huge reason why major companies trust Next.js for their most important applications. In 2025, data shows that 17,921 organizations use Next.js, including giants like Walmart, Apple, and Microsoft. They choose the framework because it delivers performance at scale—a quality you inherit when you start with a professional template.
If you're still getting familiar with the framework, understanding its core ideas is a great first step. You can learn more about what Next.js is and why it's so popular in our detailed guide. This context makes it crystal clear why starting with a template is such a powerful way to build modern web apps.
How to Choose the Right Nextjs Template
Picking a Next.js website template is one of those early decisions that can either supercharge your project or bog you down in technical debt for months. The right one lets you hit the ground running, but the wrong one can feel like trying to build a skyscraper on a shaky foundation. With so many options out there, it's easy to get swayed by a flashy demo. You've got to look under the hood.
So, where do you start? The fundamentals: code quality and the tech stack.
First, make TypeScript support a non-negotiable requirement. Seriously. In modern web development, type safety isn't a "nice-to-have"; it's essential for building anything that you plan to maintain or scale. If a template treats TypeScript as an afterthought, walk away.
The styling solution is just as critical. I'm a huge advocate for templates built with Tailwind CSS. Its utility-first approach is incredibly intuitive for customization and scales beautifully as your project grows. Be wary of templates that use complex, bespoke CSS-in-JS solutions—they can lock you into a rigid system that's a nightmare to modify later.
Assessing Code Quality and Documentation
Before you commit, get your hands on the code. If it’s open-source, clone the repository. If it's a premium template, look for a live code preview or a detailed walkthrough. A well-built template should have a file structure that makes sense immediately, with clear naming conventions and comments where they matter. Messy, disorganized code is a huge red flag that signals a maintenance headache waiting to happen.
And then there's the documentation. This is a big one. Good docs are more than a quick "how to install" guide. They should walk you through the project's architecture, show you how to customize core components, and give you practical examples for common tasks. If the documentation is thin or confusing, you’ll waste more time reverse-engineering the template than you'll save using it.
A template without clear, comprehensive documentation isn't a shortcut—it's a gamble. The time you save on setup will be lost tenfold in trying to understand and extend an undocumented codebase.
This decision-making process is often the first fork in the road when starting something new. Do you build from scratch, adapt an existing structure, or fast-track with a template?
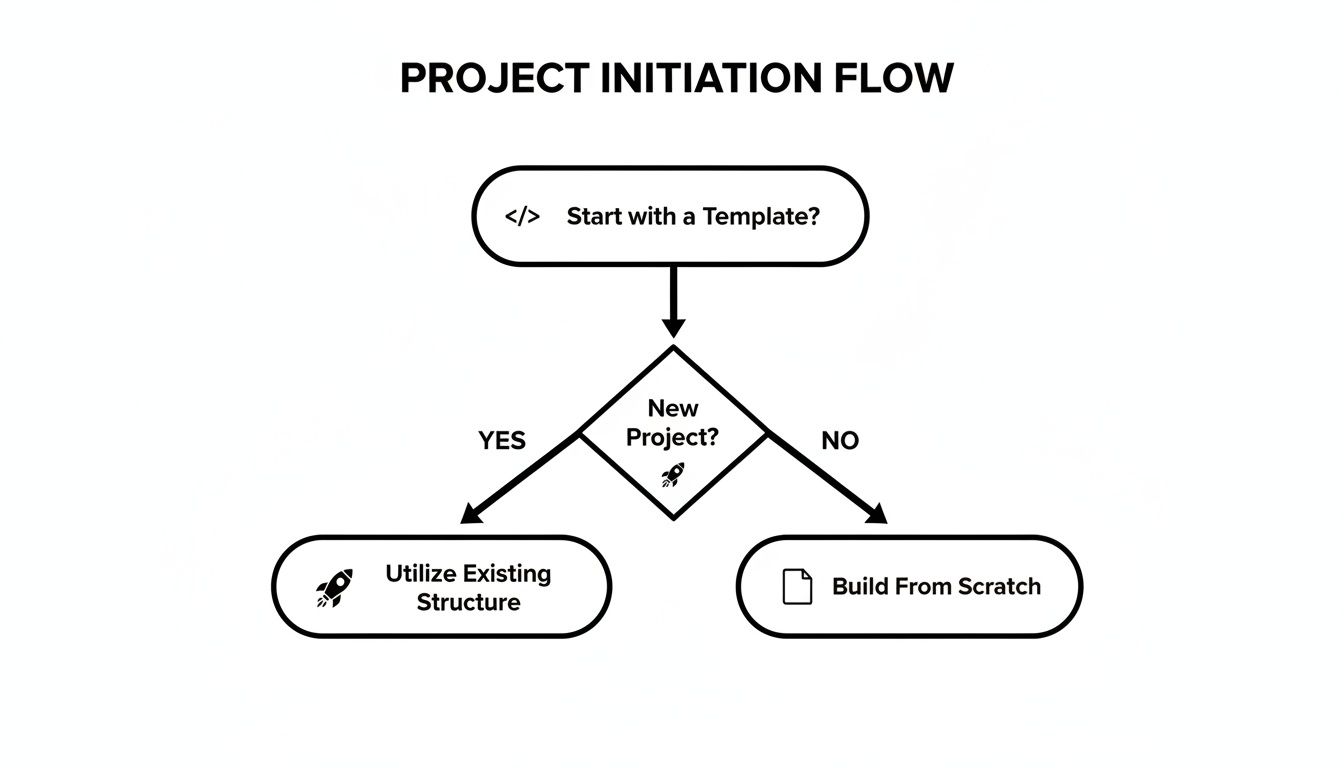
As the flowchart shows, choosing a template is a strategic move to accelerate development right from day one, but it requires careful consideration.
Finding Reliable Templates and What to Look For
The market for Next.js templates has exploded, which is great because there are options for everything from personal blogs to complex SaaS dashboards. By 2025, curated marketplaces have become the go-to source, with developers happily paying in the $20–$150 range for quality, support, and peace of mind. As Next.js continues to evolve with features like edge rendering and better performance tooling, this ecosystem only gets stronger. You can see how Next.js usage is trending on w3techs.com.
When you're browsing, keep an eye out for these key signs of a quality template:
- Active Maintenance: Check the last update date and the commit history. A template that's actively maintained will be more secure and compatible with the latest Next.js updates. A dusty repository is a warning sign.
- Community and Support: Is there a Discord server, a GitHub Discussions page, or a clear support channel? Having a place to ask questions when you get stuck is invaluable. Don't underestimate this.
- Purpose-Fit: This seems obvious, but it’s crucial. A template designed for a SaaS product will be structured differently than one for a marketing site. For instance, our own guide on SaaS templates dives into pre-built features like authentication and billing pages—things you'd have to rip out of a blog template. Choose a template that actually aligns with your end goal.
To make this even more practical, here’s a quick checklist you can use to evaluate templates based on what you're building.
Nextjs Template Evaluation Checklist
| Feature | E-commerce Site | SaaS Dashboard | Marketing Blog |
|---|---|---|---|
| Authentication | Customer accounts, social login | User roles, multi-factor auth | Optional (for comments/subs) |
| Data Fetching | ISR/SSR for product pages | Client-side fetching, SWR | SSG for posts, ISR for updates |
| Styling | Highly customizable (Tailwind) | Component library (Shadcn/UI) | Minimal, content-focused |
| Database Integration | Essential (e.g., PostgreSQL) | Essential (e.g., Supabase) | Optional (MDX-based) |
| SEO Features | Rich snippets, sitemaps | Basic meta tags, route protection | Advanced schema, Open Graph |
| Performance | Image optimization (next/image) | Code splitting, lazy loading | Fast static builds |
Ultimately, the best template is the one that gets you 80% of the way there on day one. It should provide a solid, well-documented foundation that you can confidently build upon, not one that you have to fight against.
Getting Your Project Running Locally
Alright, you've picked out a solid Next.js website template. Now for the fun part: getting it off the GitHub page and onto your own machine. This is where the magic happens and you see your project come to life for the first time. Thankfully, most template creators make this process pretty painless.
The first move is to clone the repository. You'll find a git clone command on the template's page—just copy that and run it in your terminal. Once it's downloaded, cd into the new project folder. Now you need to pull in all the packages and libraries the template depends on.
Depending on your package manager of choice, the command is dead simple:
- For npm users:
npm install - For yarn users:
yarn install
This command dives into the package.json file and fetches everything needed—React, Next.js itself, Tailwind CSS, and any other goodies the author included.
Configuring Your Environment
Pay close attention here, because this is probably the most important part of the setup. Modern apps talk to all sorts of external services, APIs, and databases. You absolutely cannot store your secret keys or database connection strings directly in your code. That’s a huge security no-no. This is what environment variables are for.
Your template will almost certainly come with a file called something like .env.example or .env.template. Your job is to make a copy of this file and rename it to .env.local. This new file is your secret vault.
The
.env.localfile is already listed in the project's.gitignorefile. This is a critical safety feature that tells Git to completely ignore it, preventing you from ever accidentally pushing your secret keys to a public repository.
For an e-commerce site using Stripe and a headless CMS, for instance, your .env.local file would end up looking something like this:
Stripe API Keys
NEXT_PUBLIC_STRIPE_PUBLISHABLE_KEY=pk_test_...
STRIPE_SECRET_KEY=sk_test_...
Headless CMS Config
CMS_API_URL=https://your-cms.com/graphql
CMS_PREVIEW_SECRET=a_very_secret_token
Getting these values right is non-negotiable. If they're missing or incorrect, your app simply won't work as expected.
Firing Up the Development Server
With your dependencies installed and environment variables locked in, you're ready to launch. The last step is to kick off the local development server. Again, this is usually a standard script you can run straight from your terminal:
- For npm:
npm run dev - For yarn:
yarn dev
This command spins everything up and launches your new site, usually at http://localhost:3000. Pop that address into your browser, and you should be greeted by the template's homepage. It's always a good idea to click through a few pages and make sure everything loads correctly and your terminal isn't screaming with errors. This quick check confirms the foundation is solid before you start writing any of your own code.
Making the Template Your Own
This is where the fun really begins. Grabbing a Next.js website template gives you a massive head start, but the real magic happens when you start molding it to fit your brand and unique needs. We're going to dive into making some meaningful, lasting changes using the powerhouse duo of Tailwind CSS and TypeScript.

The first stop for almost any project is styling. A well-built template is designed for easy customization, and with Tailwind, this whole process feels incredibly systematic and clean. Forget hunting through endless CSS files; you’ll make global changes in one central spot.
This approach is all about consistency. It saves you from writing dozens of one-off style overrides and lets you inject your brand's DNA directly into the template's core design system.
Injecting Your Brand with Tailwind CSS
Your brand identity—those specific colors, fonts, and spacing rules—is what makes your site instantly recognizable. With Tailwind, defining these is surprisingly straightforward.
Pop open the tailwind.config.js file you'll find at the root of your project. Think of this as the control center for your site's entire aesthetic.
Inside, you'll see a theme object. This is where you can extend Tailwind's default styles with your own. For instance, let's say you want to add your custom brand color palette:
/** @type {import('tailwindcss').Config} */
module.exports = {
// ...other config
theme: {
extend: {
colors: {
brand: {
primary: "#5A67D8",
secondary: "#ED64A6",
accent: "#FBBF24",
},
},
},
},
// ...plugins
}Just like that, you can use these colors anywhere in your project with utility classes like bg-brand-primary or text-brand-accent. You can apply this exact same principle to typography (fontFamily) and spacing, giving you total command over your site's visual language from one organized file.
Customizing Components with TypeScript
Beyond just the looks, you'll inevitably need to adapt the template's components to handle your specific data and logic. This is where TypeScript really shines, acting as a safety net to prevent common bugs before they ever make it to the browser.
Let's imagine you're tweaking a pricing card component. The original template might have props for a title and price. But what if you need to add a list of features and a "most popular" badge?
First, you'd jump into the component's props interface and update it:
// src/components/PricingCard.tsx
interface PricingCardProps {
title: string
price: number
features: string[]
isPopular?: boolean // Optional prop
}
export function PricingCard({
title,
price,
features,
isPopular,
}: PricingCardProps) {
// ... component JSX
}The moment you update that interface, TypeScript's compiler gets to work. It will immediately flag any instance of <PricingCard /> in your codebase that's now missing the required features prop. This kind of proactive error checking is an absolute lifesaver, especially as your application grows.
Using TypeScript to modify component props isn't just about adding fields; it's about creating a contract. You define exactly what data a component needs to function, and the compiler ensures that contract is never broken. It drastically cuts down on those pesky runtime errors.
Adding Dynamic UI with Magic UI
To really elevate the user experience, you'll want to sprinkle in some subtle, professional animations. This is where a library like our own Magic UI comes in handy. It's a collection of pre-built, beautifully animated components that you can drop into your project with almost no effort.
Often, integrating a component is as simple as installing a package and importing it into your page. This lets you add those delightful micro-interactions that make a site feel polished and alive—without having to write complex animation code from scratch. It’s a fast track to adding a layer of professionalism to your customized Next.js website template.
Optimizing for Search Engines and Performance
A sharp-looking Next.js website template is a great starting point, but it won't do you much good if it’s slow or invisible to search engines. The real magic happens when your site is lightning-fast and easy for Google to find. Thankfully, Next.js templates are built for speed, and you can push that advantage even further by learning how to improve page load speed.
Let's get into the tools Next.js has baked right in to make your site a top performer.
Performance is more than just a number on a report; it's the foundation of a good user experience. Nobody sticks around for a page that takes forever to load. This is where Next.js really shines, and a couple of features, in particular, give you an immediate boost.
Boosting Your Core Web Vitals
If you’re hunting for performance bottlenecks, start with your images. They are, without a doubt, one of the most common culprits for slow page loads. The built-in Next.js <Image> component is your secret weapon here.
It automatically takes care of the heavy lifting:
- Lazy Loading: Images won't even start to load until a user scrolls them into view, which drastically cuts down initial load time.
- Format Conversion: It intelligently serves up modern formats like WebP, which are significantly smaller than old-school JPEGs or PNGs without losing quality.
- Responsive Sizing: The component creates different sizes of an image and serves the right one for the device, so mobile users aren't stuck downloading a massive desktop image.
The other game-changer is Dynamic Imports. This lets you split your code into smaller pieces that only load when they're needed. For instance, why load a heavy data visualization library on every single page? With dynamic imports, you can make sure it only loads on the dashboard where it's actually used. This is a direct path to improving your site’s initial load time and Core Web Vitals. For a deeper dive into these strategies, our guide on https://magicui.design/blog/how-to-improve-website-loading-speed has you covered.
Mastering On-Page SEO
A fast site gets people in the door, but solid SEO is what helps them find the door in the first place. Next.js gives you a fantastic foundation for this, going way beyond just basic title tags.
With the generateMetadata function, you can manage SEO details for every single page. This means you can programmatically create unique titles, descriptions, and Open Graph tags for each blog post or product. That level of control is crucial for ranking well.
One of the most critical pieces is a dynamic sitemap. You can set up a
sitemap.xmlfile that automatically adds new pages as you create them. This ensures search engine crawlers always have an up-to-date map of your entire site.
Finally, don't forget structured data (also known as Schema markup). This is how you give search engines context. By adding a simple JSON-LD script, you can tell Google that a specific page is an article, a product review, or an event. This is what unlocks those "rich results" in search, driving way more clicks and turning your Next.js website template into a true SEO powerhouse.
Got Questions About Next.js Templates?
Jumping into a Next.js website template is a huge productivity boost, but it's smart to have a few questions before you go all in. Let's clear up some of the common things that trip developers up, so you can pick the right template and get started with confidence.
Think of this as a quick chat based on real-world experience, designed to help you navigate your options like a pro.
Are Free Next.js Templates Good Enough for Production?
Look, free templates are awesome for getting your feet wet. They're perfect for personal projects, quick prototypes, or just figuring out how Next.js works. But when you’re building something for real users—an application your business depends on—the game changes.
For a production app, you have to be ruthless about vetting free options. Is the code clean? Is it still being maintained? Does it follow accessibility best practices? This is where premium templates usually pull ahead. They almost always come with solid documentation, actual human support, and a more complete, battle-tested codebase that can save you from countless late-night coding sessions.
The fact that people happily pay for templates tells you everything. A small upfront investment often pays for itself tenfold in time saved and headaches avoided.
How Should I Handle Updates to a Template I Purchased?
This is a fantastic question, and the answer really depends on how the template author set things up. The best-case scenario is a workflow built around Git. Instead of just downloading a ZIP file, you should fork the original template repository.
Forking lets you create your own version where you can make all your customizations. When the author releases an update, you can pull their changes from the main branch and carefully merge them into your project. Always read the documentation first, though. Good authors will provide specific guides or detailed changelogs to make integrating updates a whole lot smoother.
Can I Deploy a Next.js Template to Any Host?
Yes, absolutely. Under the hood, a Next.js app is a Node.js app, which means any host that supports Node will work. However, if you want the best performance and a ridiculously simple developer experience, you should really look at platforms like Vercel and Netlify.
Vercel, created by the same team behind Next.js, offers an experience that's pretty much seamless. These platforms are fine-tuned for Next.js features like Incremental Static Regeneration (ISR), Server Components, and automatic image optimization. They take care of all the complicated server stuff for you, letting you deploy with just a few clicks.
Ready to build a stunning landing page in minutes? Check out the powerful components and templates from Magic UI. You'll build faster, design better, and get your vision launched with our production-ready UI library. Explore Magic UI today!