
Improving your website's loading speed isn't just a technical tweak; it's about fundamentally changing how users perceive and interact with your brand. The core idea is simple: shrink the amount of data a browser needs to download and process. When you get this right, your content appears almost instantly, creating a seamless and positive first impression.
Why Website Speed Is Non-Negotiable
Before we jump into the nuts and bolts of optimization, let's get one thing straight: every millisecond counts. Website speed is a cornerstone of the user experience, and it has a direct, measurable impact on your bottom line. A slow site doesn't just annoy people—it actively drives them away, damages your credibility, and sends them right into the arms of your competitors.
We live in an era of instant gratification, and user patience is razor-thin. This isn't just a feeling; the data backs it up. Google’s research found that nearly half of all consumers—about 47%—expect a website to load in two seconds or less.
It gets even more critical on mobile. A staggering 53% of mobile users will hit the back button if a page takes more than three seconds to show up. The message is clear: speed isn't a bonus feature; it's a fundamental requirement.
The Connection Between Speed and Success
The ripple effects of a slow site are felt across every important business metric. You're not just losing a few impatient visitors. You're losing revenue, eroding trust, and sacrificing your visibility on search engines. A snappy, responsive site feels professional and reliable. A sluggish one? It just feels neglected.
Your website's performance is often the first impression a potential customer has of your brand. A delay of just a few seconds can be enough to communicate that your business is inefficient or untrustworthy.
This perception has a real impact on your conversion rates. For example, shaving off just 0.1 seconds from your load time can boost retail conversions by a surprising 8.4%. That kind of data shows a clear and powerful return on investment for any time you spend on optimization.
This infographic paints a pretty stark picture of how quickly users abandon a slow site.
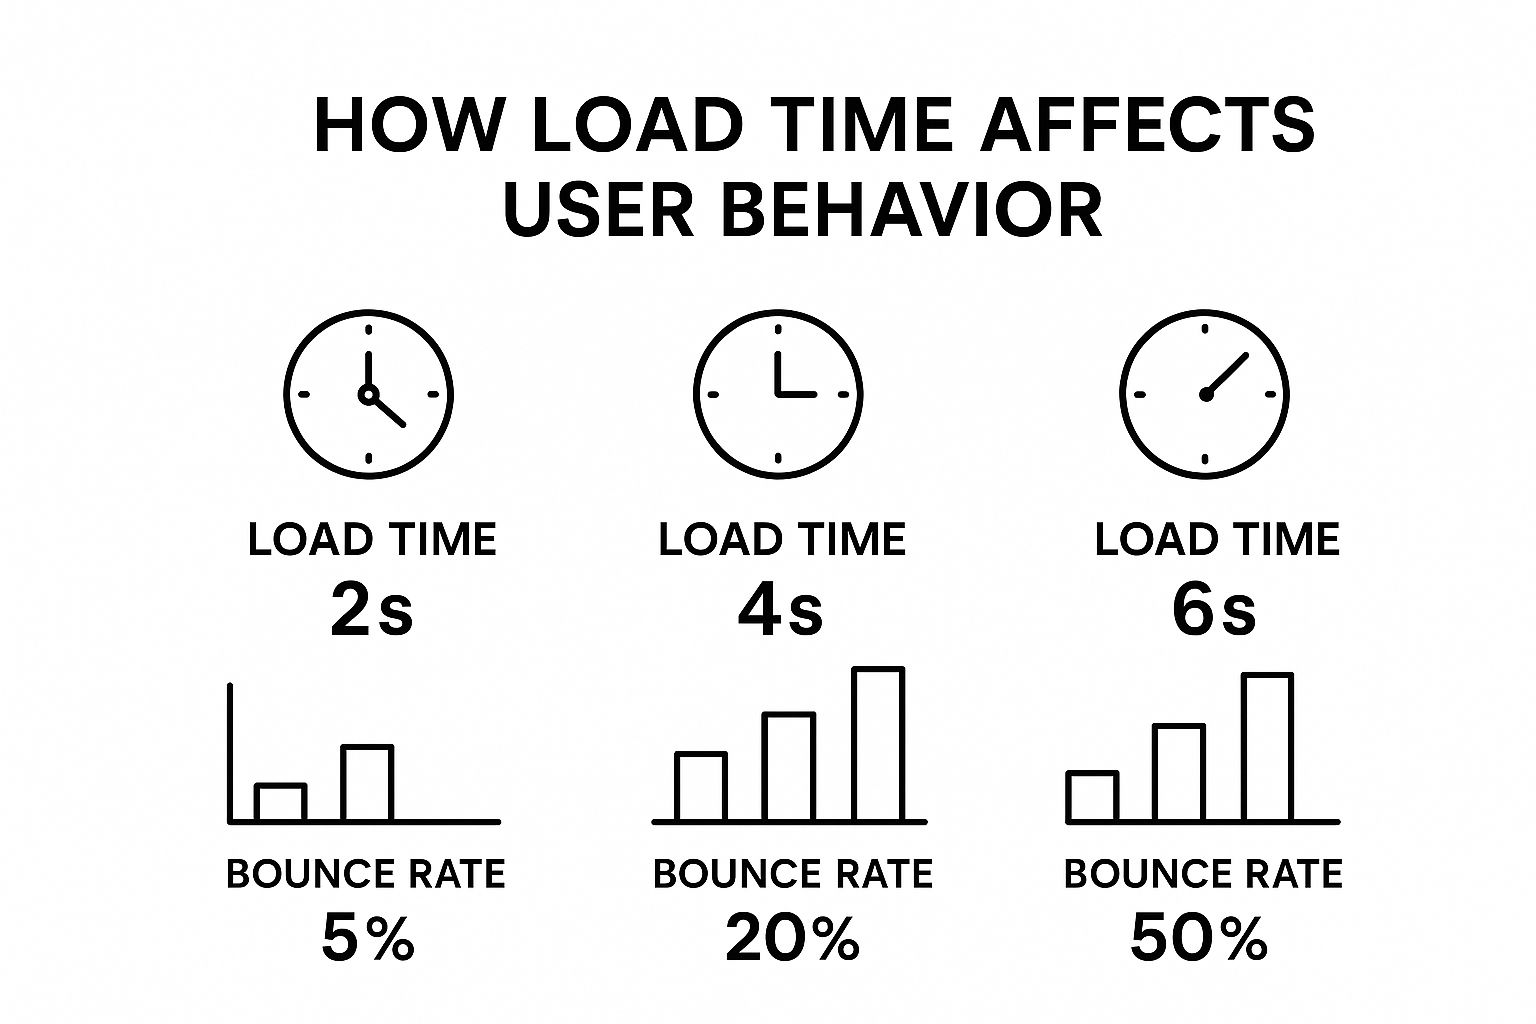
Look at that jump. Going from a 2-second load time to 6 seconds can increase your bounce rate tenfold. That’s a devastating loss of potential customers before they’ve even seen what you have to offer.
SEO and Core Web Vitals
Beyond keeping users happy, speed is a massive ranking factor for search engines like Google. They know that faster sites provide a better experience, so they reward them with better visibility. It's no coincidence that the average load time for sites on the first page of Google is a blistering 1.65 seconds.
Google's Core Web Vitals optimization guidelines make this connection even more explicit. These metrics, like Largest Contentful Paint (LCP), directly measure how quickly a user perceives your main content. A poor score here can hamstring your organic reach, making all your other SEO efforts feel like an uphill battle. A slow site is already losing the race for visibility before a user even clicks.
Optimize Your Digital Assets for Peak Performance
When you're hunting for ways to improve website loading speed, your images and videos are usually the biggest culprits. Think of them as the heaviest luggage on your webpage—they’re often the reason everything feels slow and clunky. Taming these assets is one of the most impactful changes you can make, and the best part is, you don't have to sacrifice visual quality to do it.
The guiding principle is straightforward: get your media files as small as possible without a noticeable drop in clarity. It’s a bit of a balancing act, but modern tools and formats have made this easier than ever.
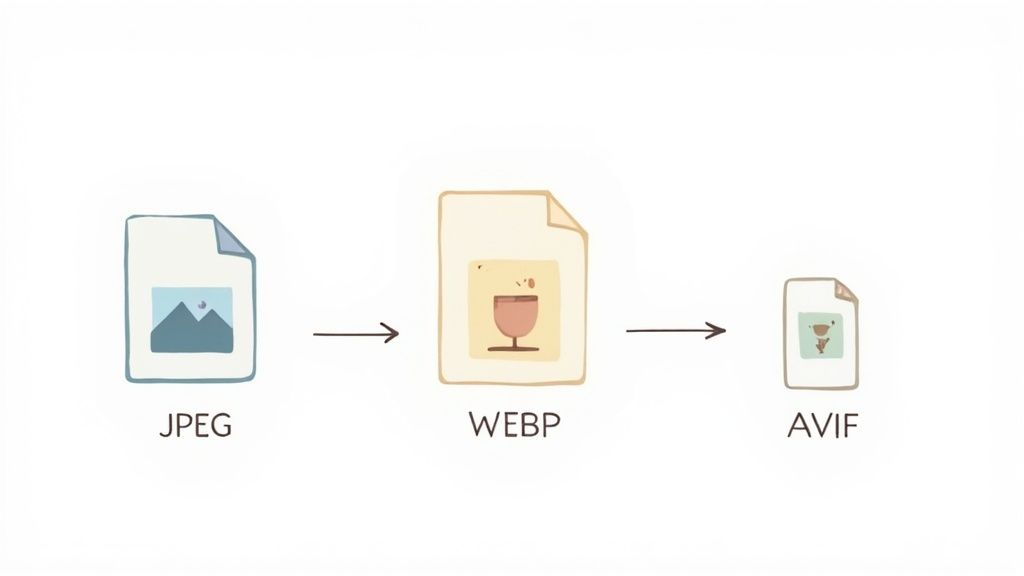
Choosing The Right Image Format
Not all image formats are built the same. The file type you select has a direct, measurable impact on its size and, by extension, how fast it loads. Picking the right format for the job isn't just a technical detail; it's a strategic move that shaves off precious milliseconds.
Before you save your next image, it's worth knowing which format is best suited for the task. Here's a quick comparison to help you make an informed decision.
| Format | Best For | Key Feature | Performance Impact |
|---|---|---|---|
| JPEG | Photographs and complex, multi-colored images. | Great balance of quality and file size with lossy compression. | Good |
| PNG | Graphics with sharp lines, logos, or transparency. | Lossless compression preserves every detail perfectly. | Moderate |
| WebP | A versatile replacement for both JPEGs and PNGs. | Offers much smaller file sizes for similar or better quality. | Excellent |
| AVIF | High-quality images where performance is critical. | Provides the best compression, but has limited browser support. | Best |
Each format has its strengths, and making a smart choice here is a simple win for performance. A user might not know you chose WebP over JPEG, but they will absolutely feel the difference when your page snaps into view.
For a deeper dive into this topic, check out our detailed guide on how to optimize images for the web, where we cover more advanced techniques.
Master Smart Compression Techniques
Once you've settled on a format, the next move is compression. This is where you algorithmically shrink the file size. You'll run into two main approaches: lossy and lossless.
Lossless compression is like perfectly organizing a suitcase—everything is still in there, just packed more efficiently to save space. It reduces file size with zero loss in quality.
Lossy compression, on the other hand, is like deciding to leave a few non-essential items behind to make the bag lighter. It strategically removes some data permanently. When done right, the human eye can't even tell the difference.
Most optimization tools give you a quality slider to control the level of lossy compression. I’ve found that a quality setting around 70-80% is the sweet spot. It usually delivers a massive reduction in file size with almost no visible degradation.
Implement Lazy Loading For a Faster Start
Picture this: a user lands on a long blog post, and their browser immediately tries to download every single image on the page, even the ones way down at the bottom. It’s a recipe for a slow, frustrating initial load.
This is where lazy loading saves the day.
It's a clever technique that tells the browser to hold off on loading images and videos until they are just about to scroll into view. Instead of a massive upfront download, the browser can focus on rendering the content the user sees first, providing a huge boost to perceived performance.
The impact is significant. On average, images make up 21% of a total webpage's weight. Switching to modern formats like WebP can slash file sizes by 25-34% compared to JPEGs, and lazy loading can improve the Largest Contentful Paint (LCP) by up to 50% on media-heavy pages.
Best of all, implementing it is ridiculously easy. Modern browsers support it natively with a single HTML attribute:

Just by adding loading="lazy", you're offloading the work to the browser. It’s one of the simplest and most effective optimizations you can make.
Leverage Caching and CDNs
You've squeezed every last kilobyte out of your assets, but now it's time to tackle the next big performance killer: distance. The physical distance between your server and your user can make even the most optimized site feel slow.
This is where caching and Content Delivery Networks (CDNs) come in. Don't let the technical names fool you; they're basically just smart shortcuts that make your site feel instantly faster for everyone, everywhere.
Think of them as a tag team. Caching handles the repeat visitors, while a CDN speeds things up for new users, no matter where they are in the world. Together, they dramatically reduce the load on your server and create a much smoother experience.
Give Returning Visitors an Instant Welcome with Browser Caching
Ever go back to a coffee shop where the barista remembers your usual order and starts making it before you even speak? That's pretty much how browser caching works.
When someone lands on your site for the first time, their browser has to download everything—HTML, CSS, JavaScript, images, the works. Browser caching is a simple instruction you give the browser to save a copy of those files locally on the user's device.
The next time they swing by, the browser doesn't need to fetch everything from your server all over again. It just loads the files it already has stored. The difference is night and day, making those repeat visits feel blazing fast.
Browser caching is your website's short-term memory. It dramatically reduces the number of requests back to your server for returning visitors, which is why subsequent page loads often feel much quicker than the first one.
Setting this up usually involves configuring "cache-control" headers on your server. This tells browsers how long to hang onto files before asking for a new version. For things that don't change often, like your logo or core stylesheets, you can set a nice long expiration date.
Go Global and Eliminate Lag with a CDN
While caching is a huge win for repeat visitors, a Content Delivery Network (CDN) is all about making that first visit lightning-fast for anyone, anywhere.
Let's say your server is physically located in Dallas. If a user from Dallas visits your site, the connection is short and sweet. But what about a visitor from Tokyo? The data has to travel halfway around the planet, and that trip takes time. This delay is called latency.
A CDN solves this geography problem by creating a worldwide network of "edge servers." These servers act like mini-copies of your website, storing your static content in dozens of locations.
When that user from Tokyo visits, the CDN automatically connects them to the closest server—maybe one right there in Japan. Instead of a cross-planet journey to Dallas, the files are delivered from just around the corner.
The results are huge. A well-implemented CDN can slash load times by as much as 50%, while good browser caching can make repeat visits feel 70% faster. The folks at Cloudflare have some great performance insights that break down how this works in more detail.
Putting a CDN to Work
Getting started with a CDN is probably easier than you think. A lot of modern web hosts, like Vercel or Netlify, have CDNs built right in that you can enable with a click.
If you're using popular libraries, serving them via a CDN is standard practice. For instance, you can see how this works by checking out this guide on using a Tailwind CDN in your HTML.
When you're picking a CDN provider, keep these points in mind:
- Global Reach: Does their network have servers (Points of Presence) in the regions where your users actually live?
- Easy Setup: Look for simple integrations or plugins for your platform, whether it's WordPress, Shopify, or a custom build.
- Bonus Features: Many CDNs bundle in other cool optimizations, like automatic image compression or code minification, giving you more bang for your buck.
By combining local browser caching with a global CDN, you're building a powerful, two-pronged attack on slow load times. You’re not just speeding up your site for one person; you're making it faster for everyone.
Streamline and Optimize Your Code
Once you’ve tuned up your server and compressed your assets, the next performance battle is fought in the code itself. Bloated or clunky HTML, CSS, and JavaScript can act like an invisible anchor, weighing down your site and making browsers work way harder than they need to. It's time to make your site's backbone lean, clean, and fast.
Think of your code files as a set of instructions for the browser. The more convoluted those instructions are, the longer it takes for the browser to read, understand, and finally execute them. Our goal here is to make these instructions as direct and concise as possible.
Shrink Your Files with Minification
One of the quickest wins in code optimization is minification. When we’re developing, we add comments, whitespace, and line breaks to keep our code readable for other humans (and our future selves). Super helpful for maintenance, sure, but completely useless to a browser. All that extra formatting just adds unnecessary weight to your files.
Minification is an automated process that ruthlessly strips out all that extra baggage. It takes a nicely formatted script and crushes it into a compact, single line of code that the browser can download and chew through much faster.
Don't mistake this for a minor tweak; the impact can be huge. Minifying your CSS, JavaScript, and HTML can slash file sizes by as much as 60%. That translates directly into faster downloads and parsing, giving you a serious performance bump for very little effort. If you want to dive deeper into the numbers, check out Google's guide on reducing network payloads.
Tackle Render-Blocking Resources Head-On
Ever seen a construction crew grind to a halt because a single, non-essential delivery truck is blocking the road? That’s exactly what happens when a browser hits a render-blocking resource. These are typically CSS and JavaScript files that the browser must download and run before it can show a single pixel of your page, leading to that dreaded blank white screen.
The trick is to figure out which scripts are absolutely essential for that initial view and which ones can wait. Your site’s core layout styles? Critical. The JavaScript for your footer’s interactive map? Probably not so much.
To fix this, we can use two simple HTML attributes: async and defer.
async: Tells the browser to download the script in the background while it keeps parsing the HTML. The script then runs the moment it's finished downloading, which might interrupt rendering. It’s best for standalone, third-party scripts like analytics.defer: Also downloads the script in the background but waits to execute it until after the entire HTML document has been parsed. This is usually the better choice for scripts that depend on the full document being ready, like interactive page elements.
Here’s what that looks like in practice:
By deferring non-critical JavaScript, you let the browser render the visible part of your page first. This drastically improves the perceived loading speed for your users and is a top recommendation in Google's PageSpeed Insights because it directly boosts your First Contentful Paint (FCP) score.
Trim the Fat by Removing Unused Code
Over the years, websites inevitably accumulate code cruft. You install a new plugin, update a theme, or retire an old feature, but the old CSS and JavaScript often get left behind. This unused code is dead weight that still gets downloaded and parsed by the browser, wasting bandwidth and processing power.
Hunting down and removing this digital baggage is a crucial cleanup step. Modern browsers have a powerful tool for this in their developer tools: the "Coverage" tab. It shows you, line by line, which parts of your CSS and JavaScript files were actually used to render the page and which were just sitting there.
Identifying unused code can feel like digital archaeology, digging through old files to find what’s no longer needed. The payoff is a leaner, faster website that isn't bogged down by the ghosts of features past.
While this can be a manual process, the results are well worth the effort. Trimming a large CSS file by even 20-30% can make a tangible difference.
For developers using modern frameworks, tools like tree-shaking can automate this during the build process, ensuring only the code that’s actually needed makes it to production. If you’re building with React, sticking to smart development patterns can also keep your codebase lean from the start. You can learn more by reading about these React best practices in our guide.
By combining minification, deferring scripts, and cutting out unused code, you’re doing more than just optimizing—you’re decluttering your site’s foundation for pure speed.
Build on a Solid Foundation with Better Hosting
You can spend weeks optimizing every image and compressing every script, but if your website is built on a shaky foundation, it will never be truly fast. That foundation is your hosting provider.
Think of it as the engine powering your entire site. Opting for a cheap, overloaded shared server is a classic case of a costly mistake disguised as a bargain. It’s like trying to build a skyscraper on a foundation meant for a small house—no matter how brilliant the architecture, the whole structure is compromised from the start. Your hosting dictates the absolute speed limit for your entire user experience.
Understanding Your Hosting Options
Not all hosting is created equal. The environment where your website lives has a direct, massive impact on its responsiveness and ability to handle traffic when you need it most. Let's break down the common types.
-
Shared Hosting: This is the budget option. Your site shares server resources—CPU, RAM, bandwidth—with hundreds, sometimes thousands, of other websites. It’s like living in a crowded apartment building; if your neighbor throws a massive party (gets a surge in traffic), the whole building feels the strain. It's an okay starting point, but you'll outgrow it fast if performance is a real priority.
-
Virtual Private Server (VPS) Hosting: A VPS is a major step up. You still share a physical server, but you get a dedicated, partitioned slice of its resources. This is more like owning a condo in that building. You have your own space and utilities, and you're not as affected by what your neighbors are doing. It gives you far more power, control, and consistency.
-
Cloud Hosting: This is the modern approach. Instead of relying on one machine, your site uses a network of connected virtual servers. It can pull resources from this "cloud" as needed, which provides fantastic scalability and reliability for sites with unpredictable traffic spikes.
As you optimize your site, don't forget the infrastructure it's built on. It's worth exploring options like free web hosting services just to get a feel for the different performance levels out there and how they might affect your speed.
The Critical First Metric: Time to First Byte
One of the most revealing metrics for server health is Time to First Byte (TTFB). This measures how long it takes for a browser to get the very first byte of data from your server after it makes a request. A slow TTFB is a red flag that your server is sluggish, creating a delay before your page can even begin to render.
TTFB is the starting gun for your page load. A fast TTFB gives your website a head start. A slow one means you're already behind before the race has even begun.
Globally, the average website page load time is around 3.21 seconds, a number heavily influenced by server response time. Google recommends a TTFB under 200ms. Hitting this target is a huge step toward passing Core Web Vitals, a feat that only 48% of mobile sites currently manage.
How to Choose a High-Performance Host
Improving your TTFB and overall site speed often comes down to picking a host that prioritizes modern tech and smart infrastructure. A fast server isn't just about raw power; it's about having an up-to-date tech stack.
Look for providers that offer:
- Modern PHP Versions: If you’re on WordPress, using the latest PHP version (like PHP 8+) can deliver a massive speed boost compared to older, outdated versions.
- HTTP/3 Support: This is the newest version of the protocol that powers the web. It offers major performance gains, especially for users on mobile or less reliable networks.
- Strategic Data Center Locations: The physical distance data has to travel matters. Choose a host with servers located close to where most of your audience is. Shorter distance means lower latency and a faster TTFB.
Upgrading your hosting shouldn't be seen as just another expense. It's a direct investment in every other optimization you make. A fast server is the bedrock that ensures all your hard work on the front end actually pays off.
Website Speed FAQs
Diving into website performance optimization always stirs up a ton of questions. As you start making changes, you'll naturally wonder where to focus your energy first or how to even read the results you're getting.
I've put together some quick, straightforward answers to the questions that come up most often. Think of this as your personal cheat sheet for making smart, effective decisions on how to speed up your site.
What Is a Good Website Loading Speed?
We'd all love "instant," but setting a realistic target is key. In my experience, a load time of under 2 seconds is the gold standard. It's what users now expect, and it feels snappy.
If you're landing between 2 and 4 seconds, you're in an acceptable range, but there's definitely room to improve. Once you creep past that 4-second mark, you’re in trouble. Bounce rates start to skyrocket. And remember, it's not just about the full page load. Core metrics like Time to First Byte (TTFB) should be lightning-fast—aim for under 200 milliseconds.
Which Optimization Has the Biggest Impact?
Looking for the biggest bang for your buck? Go straight for your images. Nine times out of ten, unoptimized images and other digital assets are the heaviest things on a page and the number one reason for slow load times.
It's the lowest-hanging fruit, but it has the highest reward. Simply compressing your images, switching to modern formats like WebP, and turning on lazy loading can produce night-and-day differences almost immediately.
The Pareto principle is absolutely in play with site speed. You'll find that 80% of your performance headaches come from just 20% of the causes—and I can almost guarantee images are in that 20%.
After you've tackled images, your next biggest wins will come from upgrading your hosting and getting a solid Content Delivery Network (CDN) in place.
Will Using Google Tag Manager Slow Down My Site?
This one comes up all the time. The short answer is: it can, but it’s not GTM itself that's the problem. An empty Google Tag Manager container has a virtually zero impact on your site's speed.
The real culprit is what you put inside it. Every single tracking script, from your analytics to ad pixels, adds another network request and eats up browser resources to execute. A GTM container packed with dozens of tags all firing at once will absolutely drag your site down.
Here’s how I recommend managing it to keep things speedy:
- Do a regular audit. You'd be amazed at how much digital junk accumulates. Get in there and remove tags for services you aren't even using anymore.
- Delay non-essential scripts. Does your heatmap tool really need to fire the second the page starts loading? Probably not. Set less critical tags to trigger after the
Window Loadedevent, or even after a few seconds of user inactivity. This lets the important stuff load first. - Get specific with your triggers. Don't just fire every tag on "All Pages." If a conversion pixel is only needed on the "thank you" page, create a trigger just for that URL.
By managing your tags thoughtfully, you can get all the marketing data you need without making your users pay the price with a slow experience. It's all about striking that balance.
Ready to build stunning, high-performance websites without the headache? Magic UI gives you a library of over 50 customizable, production-ready components built with React, TypeScript, and Tailwind CSS. Stop building from scratch and start creating beautiful, fast-loading landing pages in minutes. Explore our components and templates at https://magicui.design.