
When it comes to handling forms in React, your validation strategy can make or break the user experience. You can go the custom route with your own hooks for simpler scenarios, or you can bring in a heavy-hitter like React Hook Form for more complex, performance-critical applications.
Either way, the objective is the same: give users instant, clear feedback and make sure the data is clean before it ever hits your server. This simple practice prevents a world of hurt from bad data and keeps your users from getting frustrated.
Why Modern React Form Validation Is Essential

Before we start slinging code, it’s worth taking a moment to appreciate why solid form validation has become a non-negotiable part of modern web development. Think of validation as a conversation between your app and the user. It's there to guide them, gently correct mistakes in real-time, and ultimately build trust in your service.
A form without good validation is like talking to someone who isn't listening—it’s annoying, inefficient, and people will just give up.
This isn't just a hunch. Studies have shown that a staggering 67% of users will abandon an online form if they find it too slow, confusing, or riddled with errors. That's a massive leak in your funnel. Smart developers use validation not just to check boxes, but to actively guide users toward a successful submission.
The Dual Role of Validation
Great validation pulls double duty. It simultaneously refines the user experience while safeguarding your data. A smooth user journey depends on instant feedback, and your backend systems rely on receiving clean, predictable information.
- Enhancing User Experience (UX): Nobody likes filling out a whole form, hitting "submit," and then getting hit with a wall of red error messages. Inline validation, which checks inputs as the user types, is the gold standard for creating a frictionless experience.
- Ensuring Data Integrity: Clean data is the lifeblood of any application. Validation is your first line of defense, stopping wonky or incomplete information from ever polluting your database. This saves you an incredible amount of time on cleanup and debugging down the road.
A well-implemented validation strategy does more than just check for empty fields; it transforms a potentially tedious task into a guided, error-free process for the user, dramatically reducing abandonment rates.
Understanding common issues, like those involved in solving website form submission failures, really drives home the importance of getting this right.
Ultimately, mastering form validation is a core skill for any developer serious about building professional-grade applications. If you're still getting your bearings, our guide on how to learn React is a great place to build that foundation. That knowledge will be essential for the practical strategies we're about to dive into.
Building a Reusable Custom Validation Hook
While libraries like React Hook Form are fantastic, sometimes you just want total control without adding another dependency to your package.json. For smaller projects, or when you really want to get under the hood of React JS form validation, building your own custom hook is the way to go. This approach puts you in the driver's seat for state management, error handling, and submission logic using plain old React.
The core idea here is to bundle up all the form logic—the state, the errors, and the validation rules—into a neat, reusable function. This keeps your components clean, letting them focus on what they do best: rendering the UI. We’ll lean on useState to keep tabs on input values and error messages and bring in useEffect to re-run our validation whenever the user types something.
Laying the Foundation for Your Hook
First things first, let's figure out what state our hook needs to manage. For any form, you're really tracking two crucial things: the actual data the user has entered and any validation errors that pop up.
A straightforward setup using the useState hook is all we need to get started:
import { useState } from "react"
export const useFormValidation = (initialState, validate) => {
const [values, setValues] = useState(initialState)
const [errors, setErrors] = useState({})
// ... we'll add more logic here soon
}In this snippet, initialState will be an object holding our form fields (think { email: '', password: '' }), and validate will be a function we pass in that contains all our validation rules.
Defining Your Validation Logic
The real muscle of your custom hook is the validation function. It takes the current form values as an argument and spits out an errors object. If a field is good to go, it won't have an entry in the errors object. If it's invalid, we'll add a key with a helpful error message.
Here’s what that looks like in a real-world login form scenario:
export const validateLogin = (values) => {
let errors = {}
if (!values.email) {
errors.email = "Email address is required."
} else if (!/\S+@\S+\.\S+/.test(values.email)) {
errors.email = "Email address is invalid."
}
if (!values.password) {
errors.password = "Password is required."
} else if (values.password.length < 8) {
errors.password = "Password must be at least 8 characters long."
}
return errors
}This keeps all your validation rules in one place, making them super easy to read and tweak later. You can create different validation functions for different forms—like validateRegistration or validateProfileUpdate—and just pass the right one into your useFormValidation hook.
Building a custom hook like this really forces you to think about state management and how data flows through your app. It's a fantastic exercise for getting a deeper feel for React's reactive nature and how to handle user input gracefully.
It's also worth noting that many developers begin their validation journey with native HTML5 attributes like required or minLength right in their JSX. These built-in browser features are a quick, dependency-free way to handle the basics. To get a fuller picture, you can learn more about these native features and other React form validation strategies on tatvasoft.com. Combining native HTML validation with a custom hook can give you a surprisingly robust, layered defense against bad data.
When your forms start getting bigger than just a few simple inputs, performance can become a real headache. This is exactly where React Hook Form (RHF) comes in to save the day. It’s built from the ground up to minimize re-renders, making it a fantastic choice for complex, high-performance apps where a custom hook might start to feel sluggish.
The secret sauce? Uncontrolled components. Instead of shoving every single keystroke into React state (which, as you know, triggers a re-render), RHF registers inputs and reads their values straight from the DOM only when it needs to. This move drastically cuts down on component re-renders, leading to a much snappier and more responsive user experience, especially in those monster forms with dozens of fields.
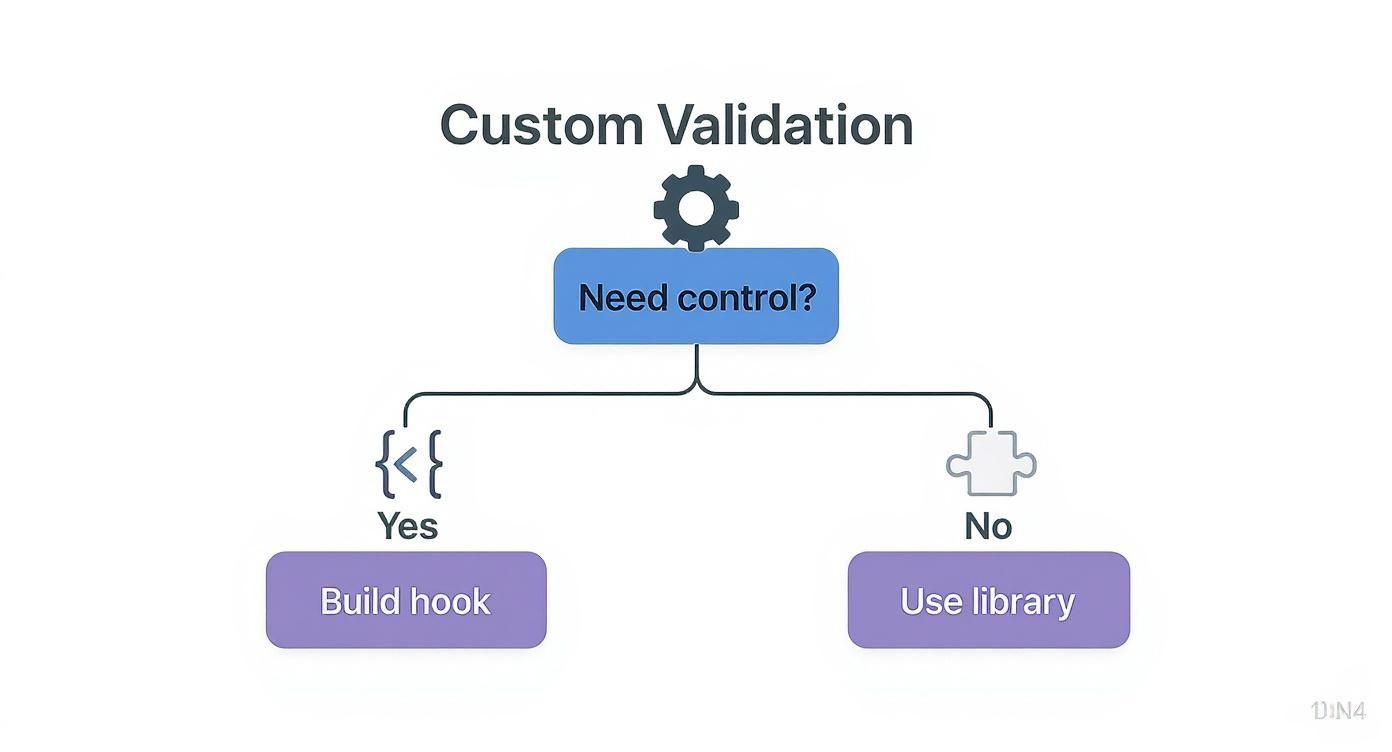
Deciding whether to roll your own custom hook or grab a powerful library is a classic developer dilemma. This visual guide can help clarify which path to take based on your project's needs.
The bottom line is that for applications that demand serious performance and scalability, a dedicated library like React Hook Form is almost always the better call over a custom-built solution.
Getting Started With React Hook Form
Jumping into RHF is surprisingly simple. The heart of the library is the useForm hook, which hands you everything you need to manage your form's state and validation. The most important piece it returns is the register function.
You use register to hook your inputs into the form. It magically handles the onChange, onBlur, and ref props for you. Here’s a quick look at what it takes to register a basic email input:
import { useForm } from "react-hook-form"
function RegistrationForm() {
const { register, handleSubmit } = useForm()
const onSubmit = (data) => console.log(data)
return (
<form onSubmit={handleSubmit(onSubmit)}>
<label htmlFor="email">Email</label>
<input
id="email"
type="email"
{...register("email", { required: "Email is required" })}
/>
<button type="submit">Register</button>
</form>
)
}See how clean that is? All the validation logic gets passed right into the register function, which keeps your JSX lean and focused on the actual structure of your form.
Declarative Validation With Schema Libraries
While RHF's built-in validation is perfect for simple rules, real-world forms often need more complex logic. This is where schema validation libraries like Yup or Zod become your best friends. They let you define all your validation rules in a separate, declarative schema object, which keeps your component code even cleaner.
React Hook Form's design philosophy prioritizes performance by isolating component re-renders. This means only the components that need to update will, preventing the entire form from re-rendering on every single input change.
This minimalistic yet powerful API is a huge reason why RHF has such a massive developer following. It cuts down on boilerplate and seriously boosts performance, especially in large-scale apps where every render counts. If you want to go deeper, you can explore RHF's advantages on LogRocket.
By pairing RHF with a schema library, you centralize your validation logic, making it far more maintainable and easier to test. It's a powerhouse combination that delivers both top-tier performance and an excellent developer experience for any React JS form validation task you can throw at it.
Comparing Form Validation Approaches in React
Choosing the right validation method really depends on what you're building. Here’s a quick comparison of the three primary validation methods discussed in this guide to help you choose the right one for your project's needs.
| Feature | Custom Hook | React Hook Form | Formik |
|---|---|---|---|
| Best For | Small projects, learning, full control | Performance-critical, complex forms | Projects needing mature, all-in-one solutions |
| Performance | Good for simple forms, can degrade | Excellent, minimal re-renders | Good, but can be less performant than RHF |
| Ease of Use | Requires manual setup and boilerplate | Very easy, intuitive API | Moderate learning curve |
| Bundle Size | None (it's your own code) | Small | Larger than RHF |
| Ecosystem | N/A | Strong, integrates well with schema libraries | Very mature, large community support |
| Component Type | Controlled components | Uncontrolled components | Controlled components |
Ultimately, for simple forms, a custom hook gives you total control. For most other projects, especially larger ones, React Hook Form's focus on performance makes it an incredibly compelling choice.
Managing Complex State Seamlessly with Formik
While React Hook Form often wins the performance race, Formik has long been the go-to for its masterful approach to state management. It's a true workhorse in the React community, especially when you're wrestling with intricate forms that have tons of values, error states, and submission logic to juggle.
The real magic of Formik is how it centralizes everything. Instead of scattering a dozen useState hooks across your component for every single field, Formik bundles all your form state into one clean, manageable object. This makes it so much easier to track field values, touched states, validation errors, and submission status. For developers who are used to React's controlled component pattern, Formik just feels right.
Getting Started with the Formik Component
The most popular way to jump into Formik is by using its component-based API. You start by wrapping your entire form in a <Formik /> component. This wrapper is where you'll define your initial values, your validation logic, and what happens on submission via the onSubmit handler.
From there, Formik uses a render props pattern to pass down all the state and helper functions your form needs. This gives you direct access to props like values, errors, touched, handleChange, and handleBlur right where you need them. It's a neat, all-in-one package.
import React from "react"
import { ErrorMessage, Field, Form, Formik } from "formik"
const SignupForm = () => (
<Formik
initialValues={{ email: "", password: "" }}
validate={(values) => {
const errors = {}
if (!values.email) {
errors.email = "Required"
} else if (
!/^[A-Z0-9._%+-]+@[A-Z0-9.-]+\.[A-Z]{2,}$/i.test(values.email)
) {
errors.email = "Invalid email address"
}
return errors
}}
onSubmit={(values, { setSubmitting }) => {
setTimeout(() => {
alert(JSON.stringify(values, null, 2))
setSubmitting(false)
}, 400)
}}
>
{({ isSubmitting }) => (
<Form>
<Field type="email" name="email" />
<ErrorMessage name="email" component="div" />
<Field type="password" name="password" />
<ErrorMessage name="password" component="div" />
<button type="submit" disabled={isSubmitting}>
Submit
</button>
</Form>
)}
</Formik>
)To make life even easier, Formik gives you helper components like <Form>, <Field>, and <ErrorMessage>. These abstract away a lot of the boilerplate code, leaving your JSX much cleaner and more declarative. For a broader look at how different React libraries solve common problems, be sure to check out our detailed guide.
Centralizing Rules with Yup
This is where Formik really starts to flex its muscles. By pairing it with a schema validation library like Yup, you can define all your validation rules in a single, reusable object schema. No more messy inline validation functions cluttering up your components.
By defining your validation rules in a separate Yup schema, you decouple the validation logic from your component's rendering logic. This makes your rules reusable, easier to test, and far more maintainable as your form's complexity grows.
This approach is a game-changer for React JS form validation. It keeps your components focused on the UI, not on the validation logic. All you have to do is pass your Yup schema to Formik's validationSchema prop, and it takes care of the rest.
Imagine a user registration form. With Yup, you can define a clear, readable schema like this:
- Username: Must be a string, at least 3 characters long, and is required.
- Email: Must be a valid email format and is required.
- Password: Must be at least 8 characters, contain a number, and is required.
This declarative style is not just easier to read; it also makes it a breeze to manage complex, interdependent validation rules without turning your UI code into a tangled mess.
Digging Into Advanced Validation Scenarios

Simply checking for required fields or basic email formats is just scratching the surface. Real-world applications need much more sophisticated React JS form validation to handle the complex business rules and user interactions we see every day. Pushing beyond the basics is what separates a decent form from a truly robust and user-friendly one.
This is where dedicated validation libraries really start to pull their weight. They save you from the headache of writing mountains of custom state management and messy effect hooks. Let's walk through a couple of common (but tricky) situations you'll almost certainly run into.
Asynchronous Validation
One of the most frequent advanced tasks is checking data against a server in real-time. The classic example? Validating whether a username or email is already taken while a user is filling out a signup form. This requires an asynchronous call to your API.
Libraries like React Hook Form and Formik have built-in support for async validation rules. You can define a validate function that returns a Promise, and the library takes care of the rest. It'll manage the loading states and wait for the Promise to resolve before deciding if the field is valid.
This gives the user instant feedback, which is huge. It stops them from filling out the entire form only to find out their desired username is long gone.
Polished asynchronous validation is one of those small details that leaves a massive impression on users. It shows your application is responsive and respects their time by catching submission errors before they can even happen.
Conditional Logic and Dynamic Fields
So many forms have fields that depend on one another. Maybe selecting "United States" in a country dropdown populates a "State" field, or checking an "Other" box reveals a new text input that's suddenly required.
If you try to implement this kind of conditional logic by hand, you’ll quickly find yourself tangled in a web of useEffect hooks. Form libraries clean this up by letting you create validation rules that hinge on the values of other fields. For instance, you can make a field required only if another field has a certain value.
Likewise, handling dynamic field arrays—like letting a user add multiple email addresses or upload several files—is a serious state management challenge. For more complex use cases like file handling, our guide on React JS file upload strategies offers a deeper dive. These libraries offer dedicated hooks or components specifically for managing arrays of inputs, which simplifies everything from adding and removing fields to validating each one on its own.
Got Questions About React Form Validation?
As you dive deeper into React JS form validation, you're bound to run into a few common questions. Let's clear up some of the big ones so you can make smarter architectural decisions and handle tricky situations with confidence.
When Should I Use a Library Instead of a Custom Hook?
This is a classic "it depends" situation, but the decision usually comes down to complexity and scale.
Building your own custom hook is a fantastic choice for simple forms. Think basic contact forms, a newsletter signup, or a simple login page. If you only have a handful of fields and want to keep your project lean by avoiding extra dependencies, a custom hook gives you total control without the overhead.
But once you start dealing with more complex scenarios—forms with tons of fields, tricky conditional logic, or asynchronous validation (like checking if a username is already taken)—a library becomes your best friend. Tools like React Hook Form are battle-tested, highly optimized for performance, and handle all the gnarly state management for you right out of the box. They'll save you a massive amount of development time.
For anything beyond a few basic inputs, the performance gains and pre-built features of a dedicated library almost always win out over a homegrown solution.
React Hook Form vs. Formik: What's the Real Difference?
The core distinction between React Hook Form and Formik boils down to their fundamental architecture.
React Hook Form is built around uncontrolled components. It registers inputs using refs, which means it minimizes re-renders. This design choice makes it incredibly fast, especially with large, complex forms, because component updates are kept isolated.
On the other hand, Formik generally uses controlled components, managing the form's state directly within React's own state system. While this approach can feel more familiar and aligned with standard React patterns, it can also trigger more re-renders, potentially bogging down performance on very heavy forms. The choice really depends on what you prioritize: raw performance or a more traditional state management flow.
How Do I Handle Server-Side Validation Errors?
Handling errors that come back from your API is absolutely critical for a robust user experience. A user might submit a form, and your server could reject it for reasons the client couldn't possibly know about—like a username that was snagged just a second ago.
The best practice is to wrap your API call in a try...catch block inside your submission handler. If the API kicks back an error (like a 400 Bad Request status), you can then use the setError function that comes with libraries like React Hook Form or Formik.
This nifty function lets you manually flag a specific field with an error message straight from the server. The best part? It displays in your UI just like any other client-side validation error, creating a seamless experience for the user.
Ready to build stunning, high-performance UIs with less effort? Magic UI offers a massive library of over 150 free, open-source animated components built with React, Typescript, and Tailwind CSS. Start building beautiful interfaces in minutes with Magic UI.