
Alright, let's get you set up with a brand-new Next.js project.
The journey begins with a single command in your terminal: npx create-next-app@latest. This slick interactive script scaffolds out a production-ready project, handling all the complex configurations behind the scenes so you don't have to. Honestly, this ridiculously simple setup is one of the biggest reasons developers flock to Next.js for building modern, high-performance web apps.
But before we start typing, let’s quickly talk about why create-next-app is such a big deal. Next.js isn't just another shiny JavaScript framework; it's a battle-tested platform built to solve the real-world problems you actually run into when building for the web. Kicking off a project this way gives you a massive head start.
There's a reason this framework has become such a dominant force. According to a recent survey of over 6,000 professionals, Next.js is the top rendering framework in 2025, with a whopping 52.9% usage rate. Its popularity comes from a powerful mix of server-side rendering (SSR), static site generation (SSG), and true full-stack capabilities. You can dig into the full tech stack report if you want to see more on those trends.
Solving Problems You'll Actually Face
What really sets Next.js apart is how its features directly map to business needs and user expectations. It’s not just about building pages; it’s about building fast, scalable, and robust applications that work.
Think about these common scenarios:
- E-commerce Sites: For any online store, page load speed is money. Next.js uses SSR and SSG to get content in front of users almost instantly, which is a proven way to slash bounce rates and lock in conversions.
- Content Platforms: A blog or a news site has to be fast and SEO-friendly to survive. The framework’s built-in optimizations make your content incredibly easy for search engines to crawl and index, boosting your visibility right out of the box.
- SaaS Applications: These apps are often a hybrid of static marketing pages and complex, dynamic dashboards. Next.js handles both beautifully within a single codebase, which radically simplifies your development workflow.
Before you even make your first commit, Next.js is already working for you. It automatically handles things like code splitting, image optimization, and prefetching. This means your app is fast and efficient without you having to spend weeks on manual configuration.
The bottom line is this: choosing Next.js means you're building on a foundation that was designed from the ground up for speed, developer experience, and scalability. You're setting your project up for success from the very first command.
When you run the setup script, you'll be asked a few questions. Your answers here will define the core architecture of your new app, so it's worth taking a moment to understand them.
Here's a quick rundown of the most important decisions you'll make and what they mean for your project.
Key Decisions During Next.js Setup
| Configuration Option | Recommendation | Impact on Your Project |
|---|---|---|
| Use TypeScript? | Yes, absolutely. | Adds static typing, which catches errors early and makes your codebase much easier to maintain as it grows. |
| Use App Router? | Yes, this is the modern standard. | Unlocks powerful features like nested layouts, server components, and granular caching. This is the future of Next.js. |
| Use Tailwind CSS? | Strongly recommended. | A utility-first CSS framework that makes styling fast and consistent. It's a perfect match for a component-based workflow. |
| Use ESLint? | Yes. | Helps you enforce a consistent code style and catch common bugs before they cause problems. A must-have for any serious project. |
| Customize aliases? | Use the default @/*. | Provides a clean, absolute path for importing modules (e.g., @/components/Button) instead of messy relative paths. |
These choices set the stage for everything that comes next. By opting for TypeScript, the App Router, and Tailwind CSS, you're embracing the modern best practices that make the Next.js ecosystem so powerful. Now, let's get that project running.
Alright, let's get our hands dirty and bootstrap a new Next.js project. The best way to kick things off is with create-next-app, the official command-line tool that handles all the boilerplate for you. Forget messing around with webpack configs or Babel presets; this tool gets you from zero to a running app in just a few minutes.
It’s more than just a project generator—it's an interactive guide that sets you up with modern best practices right from the start.
Fire up your terminal and run this command:
npx create-next-app@latest
This command starts an interactive setup script. It'll first ask you to name your project and then walk you through a few crucial configuration choices. Think of these prompts as setting the foundation for your entire application.
Decoding the Interactive Prompts
The setup script is going to ask for your preferences on some key technologies. While you can change these later, getting them right from the start will save you a ton of headaches down the road.
Here are the most important questions and the answers I strongly recommend:
-
Would you like to use TypeScript? Your answer here should be a hard yes. TypeScript brings static typing to JavaScript, which is a lifesaver for catching bugs early in development instead of when they're live in production. For any serious project, this is a no-brainer.
-
Would you like to use ESLint? Again, just say yes. ESLint is your personal code quality assistant. It enforces consistent style and sniffs out problematic patterns, keeping your codebase clean and readable—something your future self (and your teammates) will thank you for.
-
Would you like to use the App Router? Absolutely. This is the new, powerful foundation of Next.js, unlocking features like React Server Components, nested layouts, and much smarter data fetching. The old Pages Router is now considered legacy, so all new projects should be built with the App Router.
Making these choices from the beginning sets a professional tone for your project. You're opting into the full power of the modern Next.js ecosystem right out of the gate. For a deeper dive into these core concepts, check out our detailed guide on building a Next.js App.
Choosing these defaults—TypeScript, ESLint, and the App Router—isn't about chasing trends. It's a strategic move to build a more robust, maintainable, and future-proof application from day one.
The infographic below shows how these foundational choices directly contribute to a better end product, emphasizing speed, scalability, and full-stack power.
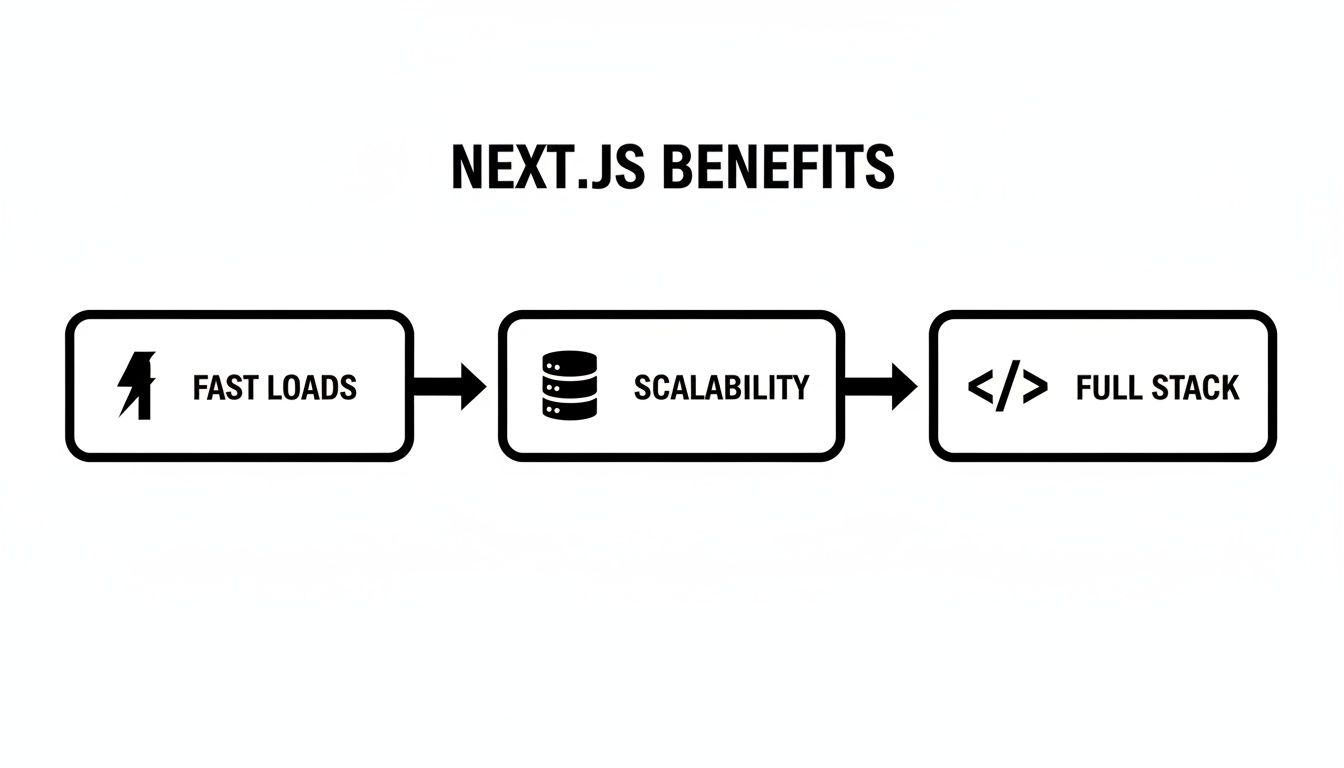
As you can see, a well-configured Next.js app isn't just about developer convenience; it delivers real benefits like faster load times and a scalable architecture that's ready for growth. Once you've answered all the prompts, the CLI will install all the necessary packages and create a new directory with your project's name. It's now ready for you to jump in and start coding.
Styling Your App with Tailwind CSS
Alright, with the project structure sorted, it’s time for the fun part: making it look good. When you said Yes to Tailwind CSS during the create-next-app setup, you gave yourself a massive head start on UI development.
If you’re new to it, Tailwind is a utility-first CSS framework. What that means in practice is you stop writing custom CSS files for every little thing. Instead, you build designs right inside your JSX by applying pre-built utility classes. This approach is a game-changer because it keeps your styles right there with your components, making them self-contained and way easier to manage down the road.
The installer gets the basics wired up, but the real magic happens in the tailwind.config.ts file. This is your command center for your entire design system.
Customizing Your Design System
Tailwind's default theme is fantastic, but let's be real—you need to make it your own. The tailwind.config.ts file is where you’ll define your brand's unique colors, fonts, spacing values, and just about anything else you can think of.
Let's say you're building a sleek, modern dashboard. You can easily extend the default theme to include your specific brand colors.
// tailwind.config.ts
import type { Config } from "tailwindcss"
const config: Config = {
content: [
"./pages/**/*.{js,ts,jsx,tsx,mdx}",
"./components/**/*.{js,ts,jsx,tsx,mdx}",
"./app/**/*.{js,ts,jsx,tsx,mdx}",
],
theme: {
extend: {
colors: {
brand: {
primary: "#0A72E4",
secondary: "#F5A623",
},
dark: {
900: "#1a1a1a",
800: "#2b2b2b",
},
},
},
},
plugins: [],
}
export default configBy nesting your custom colors inside theme.extend, you’ve just created new utility classes like bg-brand-primary and text-dark-900 that you can use anywhere. It’s a simple change that enforces brand consistency and makes your markup much more descriptive.
If you want to dive deeper, we have a complete walkthrough on our blog covering the Tailwind CSS installation and setup process.
Building Components with Utility Classes
Now, let's put this into practice and build a simple, responsive card component. Instead of hopping over to a separate .css file, we'll compose the entire design using Tailwind's utilities directly in the component.
You'll see just how fast and intuitive this is.
// components/InfoCard.tsx
import React from "react"
export const InfoCard = ({
title,
children,
}: {
title: string
children: React.ReactNode
}) => {
return (
<div className="dark:bg-dark-800 max-w-sm rounded-lg border border-neutral-200 bg-white p-6 shadow-md transition-shadow hover:shadow-lg dark:border-neutral-700">
<h3 className="mb-2 text-xl font-bold text-gray-900 dark:text-white">
{title}
</h3>
<p className="font-normal text-gray-700 dark:text-gray-400">{children}</p>
</div>
)
}The beauty of this method is its immediacy. You build, style, and see the results without ever leaving your component file. This tight feedback loop is what makes developing with Tailwind and Next.js feel so productive.
While we're focused on styling for the web here, Tailwind's utility-first approach is incredibly versatile. For a different perspective, it can be interesting to see how these same principles apply in a mobile context. This practical guide to Tailwind CSS in React Native shows just how flexible the framework is, extending its power beyond just web projects.
Adding Polished Animations with Magic UI
Okay, your app now has a solid foundation with a clean design system thanks to Tailwind CSS. It's functional, but let's be honest, functional can be a little boring. This is where we take the user experience from merely "working" to truly "delightful."
Static interfaces get the job done, but subtle, well-placed animations make an app feel alive and modern. This is exactly what Magic UI was built for.
Magic UI is a curated library of gorgeous, ready-to-use components that slot right into your Next.js and Tailwind workflow. Under the hood, it uses the incredibly powerful Framer Motion animation library, but it handles all the complexity for you. That means you can drop in stunning effects—shimmering buttons, animated grids, dynamic text—with almost no effort.
The real win here is speed. You don't have to spend days wrestling with animation timelines. Just pick a component, drop it in, and give your app a professional, polished feel that captivates users.
Installing Magic UI Dependencies
Getting Magic UI set up is a breeze. Since it’s designed to work with your existing stack, you just need to add a few small dependencies. These packages handle the animation logic (framer-motion) and intelligently merge your Tailwind classes (clsx and tailwind-merge).
Pop open your terminal in the project's root directory and run this single command:
npm i framer-motion clsx tailwind-merge
And that's it. With those packages installed, you're ready to bring your first animated component to life. If you ever need more detailed instructions, the official Magic UI installation documentation is the place to go.
Implementing Your First Animated Component
Let's start with a classic: swapping a plain old button for something more engaging. The "Shimmer Button" from Magic UI is a perfect first choice. It adds a subtle, elegant glow effect on hover that instantly grabs the user's eye.
First, you need to bring the component's code into your project. This is the recommended approach because it gives you full control for any future tweaks.
- Create a new folder path:
components/magicui/ - Create a new file inside it named
shimmer-button.tsx - Go to the Shimmer Button page on Magic UI, click the "Code" tab, and copy the source code into your new file.
Now, you can import and use it in your app/page.tsx file (or anywhere else) just like any other React component.
import ShimmerButton from "@/components/magicui/shimmer-button"
export default function HomePage() {
return (
<main className="flex min-h-screen flex-col items-center justify-center p-24">
<div className="z-10 w-full max-w-5xl items-center justify-center font-mono text-sm lg:flex">
<ShimmerButton className="shadow-2xl">
<span className="text-center text-sm leading-none font-medium tracking-tight whitespace-pre-wrap text-white lg:text-lg dark:from-white dark:to-slate-900/10">
Get Started Now
</span>
</ShimmerButton>
</div>
</main>
)
}Just like that, you've added a layer of interactivity that makes your UI feel more dynamic and satisfying. This is the core value of Magic UI—achieving maximum visual impact with minimal code.
From Local Dev to Live Deployment
With the basic structure and styling locked in, it's time to actually see our app in action. This is a two-part dance: first, we run it on our own machine to build and test, and then we push it live for the world to see.

Thankfully, the local development experience with Next.js is incredibly smooth. All it takes is one command from your project's root directory:
npm run dev
That single line fires up a local development server, which you can usually find humming away at http://localhost:3000. This isn't just a static preview, either. It’s a full-blown dynamic environment with hot-reloading built right in.
What does that mean for you? Any change you save in your code—a tweak to a component, an adjustment to a style—shows up in your browser almost instantly. No more hitting refresh a thousand times a day. This tight feedback loop is a game-changer for building UIs efficiently.
Going Live with Vercel
Once you’re happy with how the app is running on your machine, the final step is getting it online. When you create a Next.js app, there's really no better place to host it than Vercel. They're the creators of Next.js, so their entire infrastructure is purpose-built to make your application fly.
Vercel’s whole deployment process is designed to be ridiculously easy, tying directly into your Git workflow.
- Connect Your Git Account: First, you’ll need a free Vercel account. The easiest way is to sign up with your GitHub, GitLab, or Bitbucket account. This connection is what makes the magic of automated deployments possible.
- Import Your Project: From the Vercel dashboard, just hit "Add New... Project" and find the repository you've been working on. Vercel is smart enough to detect it’s a Next.js project and will automatically handle all the build settings for you.
- Add Environment Variables: If your app relies on any secret keys or API tokens (like for a database), you can add them in the "Environment Variables" section of your project settings. This keeps your secrets secure and out of your public codebase.
The real superpower here is Continuous Deployment. Once you're all set up, every time you
git pushto your main branch, Vercel automatically kicks off a new build and deploys it. Your live site always stays in sync with your latest code, no manual steps required.
With just a few clicks, Vercel builds your project, pushes it to its global edge network, and gives you a live URL. Just like that, your Next.js application is online. This simple, automated workflow strips away the old complexities of shipping software, freeing you up to focus on what actually matters—building cool stuff.
Even with the best tools, you're bound to hit a few snags. That's just part of development. Building a Next.js app involves a lot of moving parts, and knowing how to squash common bugs is a skill that'll save you countless hours of banging your head against the wall. Think of this as your field guide for the most common issues you'll run into.
Sooner or later, it happens to everyone. You save a file, the browser refreshes, and... all your styling is gone. It's a classic rite of passage when you're working with a utility-first framework like Tailwind CSS.
Fixing Unapplied Tailwind Classes
This is probably the number one issue people face: your Tailwind classes just stop working. You add bg-blue-500 to a div, but your background stays stubbornly white. I can tell you from experience that in 99% of cases, this isn't a bug. It's almost always a simple configuration mix-up.
The culprit is usually your tailwind.config.ts file. Tailwind's magic works by scanning your files for class names and then generating only the CSS you actually use. If you create a new folder for your components—say, src/layouts—and forget to tell Tailwind to look there, it won't see your new classes.
The fix is easy. Just make sure your content path in the config file is broad enough to catch everything:
// tailwind.config.ts
const config = {
content: [
"./pages/**/*.{js,ts,jsx,tsx,mdx}",
"./components/**/*.{js,ts,jsx,tsx,mdx}",
"./app/**/*.{js,ts,jsx,tsx,mdx}",
// Make sure to add any other directories you're using!
"./src/**/*.{js,ts,jsx,tsx,mdx}",
],
// ... rest of your config
}One crucial detail: after updating the config, you must restart your dev server (npm run dev). A simple browser refresh won't cut it. Restarting forces Tailwind to re-scan your entire project and build the correct stylesheet.
Resolving Hydration Mismatches
Another error that throws a lot of developers for a loop is the infamous hydration mismatch. You'll see a cryptic message in your console that looks something like this: Warning: Text content did not match. Server: "..." Client: "...".
What's going on here? This error pops up when the HTML rendered on the server doesn't perfectly match what React generates on the client during its first pass. It’s a common problem when you're using anything that only exists in the browser, like window.localStorage, or something dynamic that's guaranteed to be different, like the current time.
For instance, if you try to render new Date().toLocaleTimeString() directly in a component, the server's time will be a few milliseconds different from the client's time, triggering the mismatch.
The secret to fixing hydration errors is to make sure any client-side-only logic only runs on the client. Don't even let the server attempt to render it. This completely sidesteps the mismatch.
A reliable pattern for this is to use the useState and useEffect hooks. This effectively delays the rendering of your client-specific code until after the initial server render has been "hydrated" on the client.
"use client"
import { useEffect, useState } from "react"
const ClientOnlyComponent = () => {
const [isClient, setIsClient] = useState(false)
useEffect(() => {
// This runs only on the client, after the initial render
setIsClient(true)
}, [])
if (!isClient) {
return null // Or you could return a loading skeleton here
}
// Now you're safely on the client and can use browser APIs
return (
<div>
Your current timezone is:{" "}
{Intl.DateTimeFormat().resolvedOptions().timeZone}
</div>
)
}This little trick ensures your component handles the server-to-client transition smoothly, getting rid of those frustrating errors and keeping your console nice and clean.
Answering Your Next.js Questions
As you get your hands dirty building a Next.js app, a few questions always seem to come up. Let's tackle some of the most common ones head-on so you can build with confidence and sidestep the usual hurdles.
App Router or Pages Router?
This one’s easy. For any new project you’re starting today, the App Router is the only way to go. It’s the modern foundation of Next.js, unlocking seriously powerful features like React Server Components, nested layouts, and smarter data fetching strategies.
The Pages Router is still around for older projects, but all the exciting new stuff is happening in the App Router.
Good news is,
create-next-appdefaults to the App Router, so you're already on the right track from the moment you initialize a new project. Sticking with it makes sure your app is scalable, fast, and ready for whatever comes next.
Server Components vs. Client Components
This is a fundamental concept in the App Router that you'll want to grasp early. By default, every single component you create is a Server Component. That means it runs only on the server, which is fantastic for performance because it slashes the amount of JavaScript that gets sent to the browser.
Need some interactivity, like a button that responds to a click or state managed with useState? You have to explicitly make it a Client Component. Just add the 'use client'; directive right at the top of your component file, and you're good to go.
Adding Global CSS and Fonts
The best place to handle your global styles is by importing your main stylesheet directly into the root layout file, usually app/layout.tsx. This simple move ensures your styles are applied consistently across every single page in your app.
When it comes to fonts, you'll want to use the built-in next/font module. It’s a game-changer. It automatically optimizes and self-hosts any font you choose, which dramatically boosts performance and kills any annoying layout shifts. Getting these fundamentals down is crucial. And if you're looking for other ways to streamline your workflow, it's always worth exploring strategies to improve developer productivity.
Ready to build stunning, animated user interfaces without all the heavy lifting? Magic UI gives you over 150 free, open-source components that plug right into your Next.js and Tailwind CSS projects.