
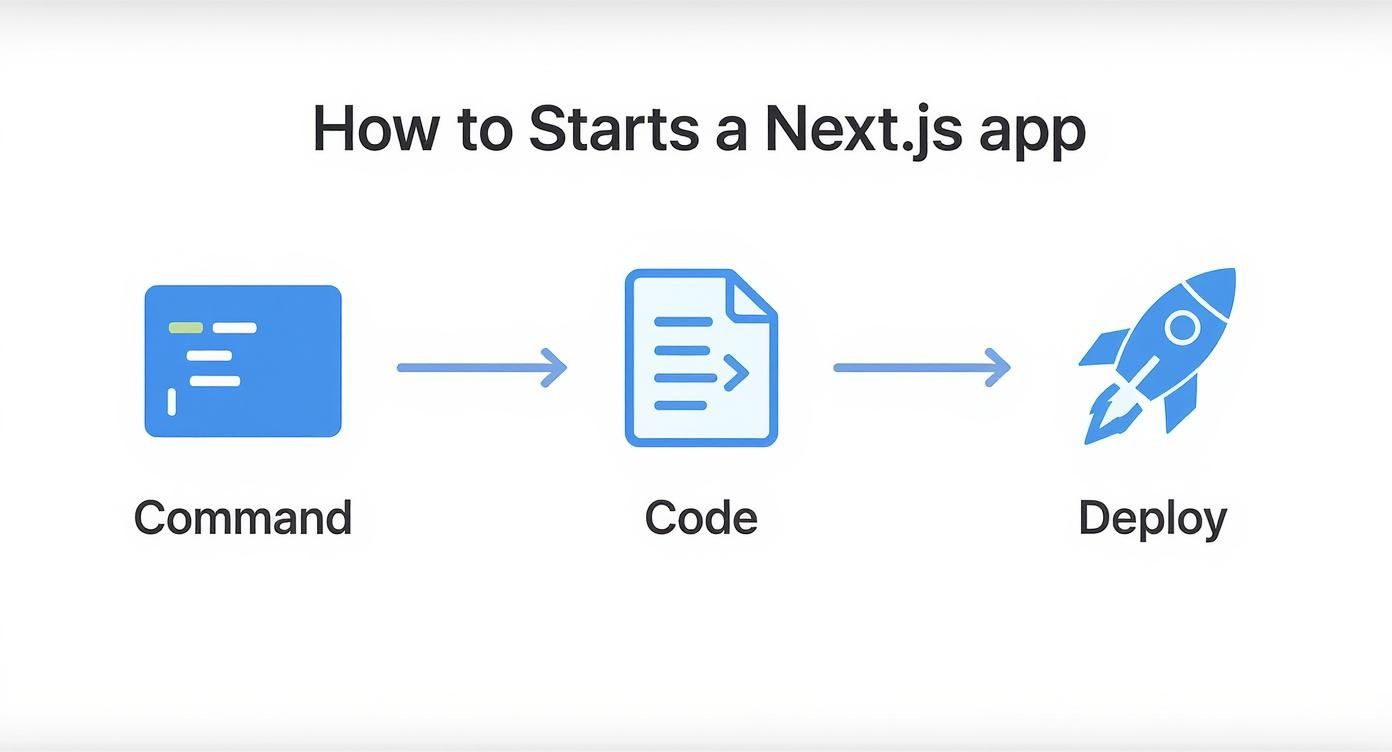
To kick things off, the quickest way to create a NextJS app is by using the create-next-app command-line tool. Seriously, a single command scaffolds out an entire production-ready project. All the necessary configurations are handled for you, letting you jump straight into coding in just a few minutes. It’s the official, recommended way to start any new Next.js application for a reason.
Your Launchpad for Modern Web Apps
Starting a new project can feel a bit overwhelming, like staring up at a mountain. Where do you even begin? This guide is designed to cut through that noise. We’ll show you exactly why developers are flocking to Next.js for everything from sleek portfolio sites to complex enterprise applications.
Before we get our hands dirty, it helps to have a grasp of some general web development concepts, as frameworks like Next.js build on top of these fundamentals.
We're going to zero in on the features that make Next.js an absolute powerhouse for building fast, SEO-friendly websites. You'll get a clear picture of its core functionalities, like server-side rendering (SSR) and the App Router. If you want a refresher, you can check out our deep dive on what is Next.js right here on our blog: https://magicui.design/blog/what-is-nextjs.
To give you a quick overview, here’s a look at the essential Next.js features we’ll be touching on in this guide and how they directly benefit your project.
Core Next.js Features and Their Impact
| Feature | Primary Benefit | How It Helps Your App |
|---|---|---|
| App Router | Intuitive file-based routing | Simplifies creating new pages and organizing your application structure. |
| Server-Side Rendering (SSR) | Improved SEO & faster initial load | Pages are rendered on the server, delivering fully-formed HTML to the browser. |
| Automatic Code Splitting | Enhanced performance | Only the necessary JavaScript is loaded for each page, keeping your app fast. |
| API Routes | Built-in backend functionality | Easily create serverless API endpoints without needing a separate backend. |
These features are precisely why Next.js has become the go-to framework for so many developers.
Why NextJS is the Go-To Framework
The proof is in the pudding. Developer preference and the explosive growth of its ecosystem really highlight its dominance. A recent State of JavaScript survey revealed that a staggering 68% of developers who use React also choose Next.js for their production apps.
Its built-in goodies—like API routes, automatic image optimization, and incremental static regeneration (ISR)—have been the driving force behind its widespread adoption by companies big and small.
This powerful feature set is the perfect foundation for what we're about to build. We'll be integrating other modern tools to create a professional-grade stack right from the very beginning.
We're setting the stage to bring in powerful additions like TypeScript for clean, maintainable code and Tailwind CSS for rapid, beautiful UI design. Think of this guide as your complete roadmap.
We'll take you from a single command-line prompt all the way to a fully deployed, production-ready application on a platform like Vercel. Let's get started.
Setting Up Your Development Environment
This is where the magic starts. Before we get into the nitty-gritty of coding, we need to lay a solid foundation for our project. Thankfully, the days of manual, tedious setup are long gone. The best and fastest way to get a Next.js app off the ground is with create-next-app.
This command-line tool is the official workhorse for bootstrapping a complete, production-ready Next.js project. A single command handles all the boilerplate, dependencies, and essential scripts, saving you a ton of time and potential headaches right from the start.
The Interactive Setup Process
Pop open your terminal and run npx create-next-app@latest. This kicks off a friendly, interactive process that will ask you a series of questions to tailor the project to your exact needs.
Here's a quick look at the prompts you'll see and my personal recommendations:
- Project Name: First things first, give your app a name.
- TypeScript: It'll ask if you want to use TypeScript. My advice? Say yes. Type safety is a lifesaver on larger projects, catching errors before they ever make it to the browser.
- ESLint: This is your code quality guardian. Definitely enable it to keep your code consistent and clean from day one.
- Tailwind CSS: For styling, you get the option to include Tailwind CSS. It’s a utility-first framework that has completely changed how I build modern UIs. It's incredibly fast and intuitive. For a deeper dive, our guide on how to install Tailwind CSS is a great next step.
src/directory: This is a classic organizational choice. Using asrcdirectory helps keep your app's core logic separate from configuration files. I always go for it.- App Router: This is a big one. The App Router is the modern, recommended way to handle routing in Next.js. It's built on React Server Components and opens up powerful features like nested layouts and streaming. Stick with this.
- Import Alias: This lets you set up a shortcut, like
@/*, for your import paths. It’s a small tweak that makes your code so much cleaner and easier to read down the line.
This simple workflow takes you from a single command to a fully configured project, ready for you to start building.
This CLI ensures your starting point is perfectly aligned with your project's goals, without any manual fuss.
Understanding Your New Project Structure
Once the setup is finished, you’ll have a new directory filled with files and folders. It might seem like a lot at first, but everything has a specific purpose. This clean organization is one of the biggest strengths of using a framework like Next.js.
The growth of Next.js has been nothing short of explosive, making it the go-to full-stack React framework for countless developers. It boasts a massive 52.9% adoption rate among React devs, which speaks volumes about its power and usability. The App Router, introduced in Next.js 13, is a huge part of that success, making routing feel more natural within React's component-based world.
Let's take a quick tour of the most important folders you'll be working with:
app/: This is the heart of your application and where the App Router works its magic. Every folder you create here becomes a new route in your app. To create a page for that route, you just add a
page.tsxfile inside it. public/: This is the spot for any static assets that don't need to be processed by the build, like images, fonts, or yourrobots.txtfile. next.config.mjs: Your main configuration file for Next.js. As you grow, you'll come here to tweak advanced settings and customize the framework's behavior.
Building Your First Page with Reusable Components

Alright, with our project structure sorted, it's time for the fun part: actually building something. Sure, we could just throw a "Hello World" on the page, but that doesn't mirror how real projects get built. The modern workflow is all about speed and efficiency, which means grabbing pre-built components to get a head start.
This approach lets you sidestep the tedious work of building every button, card, and grid from scratch. You get to focus on the unique logic and features of your application instead.
To show you how this works in practice, we're going to pull in some components from Magic UI. It’s a fantastic library of beautifully designed, ready-to-use components. These aren't just static HTML and CSS; they're built with React, Tailwind CSS, and Framer Motion, giving you slick, animated elements with a simple copy-paste.
Integrating Magic UI into Your Project
Before we can drop in any cool components, we need to add a few dependencies they rely on. Think of this as a one-time setup to give our project the tools for handling animations and slick styling utilities.
Pop open your terminal and, from your project's root directory, run this command:
npm i framer-motion lucide-react clsx tailwind-mergeHere's a quick breakdown of what you just installed: framer-motion is the powerhouse for animations, lucide-react gives us a great set of icons, and clsx and tailwind-merge are handy utilities for managing your CSS classes without conflicts.
With those dependencies in place, you can head over to the Magic UI component library and start window shopping. For this guide, we'll grab the Bento Grid—it's a super popular layout for showcasing features in a clean, modern way.
A huge plus for Magic UI is that its components are designed to be self-contained. You can literally copy the code for a component and drop it directly into your project. No complex configs, no headaches. It's an incredibly fast way to build a polished UI.
Just find the component you want on the Magic UI website, click to view the code, and copy it into a new file. I always recommend creating a components/ui directory to keep these third-party elements organized.
Creating a Component-Driven Homepage
Let's ditch the default Next.js starter content in app/page.tsx and replace it with something more dynamic. We’ll import the Bento Grid component we just saved and use it to build out our main page. This is where you really start to see the power of a component-driven approach.
As you get more into building reusable components, it's worth getting familiar with what a design system entails. It’s a key concept that helps keep your application consistent and scalable.
Here’s a quick look at what your page.tsx might look like after you've pulled in the new component. Notice how readable it is—you're just telling React what to render, not how.
import { Calendar, Globe, Zap } from "lucide-react"
import { BentoCard, BentoGrid } from "@/components/ui/bento-grid"
const features = [
{
Icon: Globe,
name: "Global Reach",
description: "Connect with users from all over the world.",
href: "/",
cta: "Learn More",
className: "col-span-3 lg:col-span-1",
},
{
Icon: Calendar,
name: "Automated Scheduling",
description: "Plan your events and meetings with ease.",
href: "/",
cta: "Learn More",
className: "col-span-3 lg:col-span-2",
},
{
Icon: Zap,
name: "Lightning Fast",
description: "Blazing fast performance for a seamless user experience.",
href: "/",
cta: "Learn More",
className: "col-span-3 lg:col-span-2",
},
]
export default function HomePage() {
return (
<BentoGrid className="lg:grid-rows-3">
{features.map((feature) => (
<BentoCard key={feature.name} {...feature} />
))}
</BentoGrid>
)
}This code snippet perfectly illustrates a core principle of modern web dev. You define your data in a simple array (features), and then you map over it to render your UI components. It makes the page incredibly easy to update—just change the data, and the UI follows.
If you want to dive deeper into structuring your own components, these React component best practices are a great read. Just like that, you've transformed a boilerplate project into a visually compelling page in a matter of minutes.
Getting to Know the App Router and Project Structure
A clean project structure isn't just about being tidy—it's the foundation of an app that's easy to maintain and scale. When you first spin up a Next.js app, the folder layout might look a little overwhelming. But once you get the hang of it, you'll see it’s built on a logical and surprisingly intuitive pattern: the App Router.
At its core, the App Router is a file-based system. That’s a fancy way of saying your folder structure creates your URL routes.
The app/ directory is where the magic happens. Need a new page at /about? Just make an app/about folder and drop a page.tsx file inside. That’s literally it. Next.js connects all the dots for you, handling the routing behind the scenes.
This simple convention is powerful because your code's physical location directly mirrors your site's navigation. No more hunting for route configurations.
Building Routes and Layouts
Let's think through a real-world example, like building a blog. You'll want a main page to list all your posts. To do that, you’d create a directory at app/blog/ and put your page.tsx file in there. Easy enough.
But what about individual blog posts? That's where dynamic routes come in.
By creating a folder named app/blog/[slug]/, you're telling Next.js that the slug part is a variable. A page.tsx file inside that folder will then render any matching URL, like /blog/my-first-post or /blog/learning-nextjs.
Next.js also gives you a few special files to create a consistent, robust experience for your users:
layout.tsx: This defines a shared UI—think headers, footers, or navigation sidebars—that wraps around its child pages.page.tsx: This is the main, unique UI for a specific route. It's what people actually see.loading.tsx: A slick way to show a temporary UI, like a spinner, that automatically appears while a route's content is loading.error.tsx: Your safety net. This fallback UI renders if something breaks within a specific route segment.
These special files work together in a nested hierarchy. A layout in your root
appfolder will apply to the entire application. But a layout insideapp/blogwill only apply to the blog section. This lets you build powerful, predictable UI structures with minimal effort.
Server vs. Client Components
One of the game-changing features of the App Router is how it handles Server Components and Client Components. Here's the key takeaway: by default, every component you create inside the app directory is a Server Component.
This is a huge win for performance. Server Components run only on the server, meaning they send minimal JavaScript to the browser. They're perfect for fetching data, accessing backend resources, or rendering static content.
The catch? They can't use browser-only features like useState or useEffect for interactivity. For that, you need a Client Component.
Making one is simple: just add the "use client"; directive at the very top of your file. This signals Next.js to send the necessary JavaScript to the browser to make the component interactive.
The trick is to be strategic. Use Client Components only where you absolutely need interactivity. This philosophy is central to the framework's legendary performance, which is kept sharp by an incredibly active community. The median review approval time for Next.js pull requests is a blazing-fast 44 minutes—a testament to a rapid development cycle that constantly refines features like these. You can dig into more data on Next.js development velocity and community engagement if you're curious.
By understanding this fundamental structure, you’re already set up to build a clean, organized, and lightning-fast application from day one.
Deploying Your NextJS App to Vercel
Okay, so you've built out your pages, dialed in the styles on your components, and your file structure is looking clean. Now for the fun part: showing it to the world. But before we push it live, let's do one final check locally to make sure everything is running as expected. This is a simple but critical habit to get into.
Pop open your terminal, make sure you're in your project's root folder, and run npm run dev. This will fire up a local development server, which you can usually find at http://localhost:3000. One of the slickest features of the Next.js workflow is Fast Refresh, which instantly updates your browser with any code changes you make without wiping out your component state. It’s a huge time-saver.
From Localhost to Live URL
Once you've confirmed everything looks good locally, deploying with Vercel is almost laughably easy. Since Vercel is made by the same team behind Next.js, the two are perfectly integrated. The first thing you'll need to do is push your project to a Git provider. Think GitHub, GitLab, or Bitbucket.
With your code living on GitHub, you can sign up for a Vercel account using that same profile. This is the magic link that enables Vercel's whole automated deployment system.
Vercel is all about Git-driven deployment. What that means is every single
git pushcan automatically kick off a new build and deploy. This turns updating your live site into a simple code commit, which is a game-changer for solo devs and large teams alike.
After linking your accounts, you can import your project repository straight into Vercel. The platform is smart enough to detect that it's a Next.js app and will configure all the necessary build settings for you. Seriously, you usually don't have to touch a thing.
Configuring and Launching
As you're importing the project, Vercel will give you a spot to set up environment variables. This is the secure place to put all your secrets—API keys, database connection strings, you name it. These variables are kept out of your public code but are injected into the build process when your app is deployed.
Once those are set, just hit the "Deploy" button. From there, Vercel takes over and does all the heavy lifting:
- It pulls the latest code from your main branch.
- It installs all your project's dependencies.
- It builds a production-ready version of your Next.js app.
- Finally, it deploys the optimized assets across its global edge network.
The whole thing is usually done in just a couple of minutes. When it finishes, Vercel hands you a public URL where your app is live. From this point on, every time you push a new commit to your main branch, Vercel will automatically redeploy the changes. What used to be a complicated, multi-step process is now just a natural part of your workflow.
Answering Common NextJS Questions
As you dive into your first Next.js app, you're bound to run into a few questions. This isn't just you; these are the things most developers puzzle over when they're starting out. Think of this as a quick FAQ to get you past those common hurdles so you can get back to building.
Should I Use the App Router or Pages Router?
For any new project you’re kicking off, the App Router is the clear winner. No contest. It's the modern foundation of Next.js, built from the ground up to support new React features like Server Components and Streaming. The end result is just plain better performance and a more logical way to structure your app.
The old Pages Router still works, but all the innovation and new features are happening in the App Router. Going with the App Router makes your app future-proof and lets you use all the latest and greatest tools in the ecosystem.
How Do I Manage Environment Variables?
Next.js has a dead-simple, built-in system for this. You absolutely need it for things like API keys or database connection strings that you can't just hardcode into your app.
Here’s the rundown:
- Create a file named
.env.localright in the root of your project. - Inside, add your variables. For example:
DATABASE_URL="your-super-secret-value". - Need to use a variable in the browser? You must prefix it with
NEXT_PUBLIC_. Something likeNEXT_PUBLIC_API_KEY="this-one-can-be-public". - Most importantly, add
.env.localto your.gitignorefile. This is critical—it stops your secrets from ever getting accidentally pushed to GitHub.
This setup keeps your server-side secrets safe on the server where they belong, which is a huge win for your app's security.
What Is the Difference Between Server and Client Components?
This is probably the biggest mental shift with the App Router. By default, every component you create is a Server Component. These guys run only on the server, doing the heavy lifting like fetching data and rendering HTML before anything gets sent to the browser. It's amazing for performance because it means less JavaScript for the user to download.
But what about interactivity? If you need a button that responds to a click (useState) or want to fetch data on the client (useEffect), you need a Client Component. It's an opt-in system: just add the 'use client' directive to the very top line of your component file.
My rule of thumb is this: assume everything is a Server Component. Only convert something to a Client Component when you absolutely need that browser-side interactivity. This keeps your application as fast and lean as possible.
Can I Host My App Somewhere Besides Vercel?
Absolutely. Vercel is fantastic—it’s made by the same team behind Next.js, so the deployment experience is incredibly smooth. But it's far from your only option. Next.js apps are just Node.js applications at their core, so they can run almost anywhere.
Plenty of developers host their Next.js projects on platforms like Netlify, AWS Amplify, or Render. You can even deploy it to your own custom server if you want to. The official Next.js documentation has great guides for all the popular hosting providers, so you have the freedom to pick whatever works best for your project and your budget.
Ready to build stunning UIs with the same speed and efficiency we've talked about here? Magic UI gives you a massive library of 150+ free, open-source animated components and premium templates designed to make your workflow faster. Check out the collection and start building beautiful landing pages in minutes at https://magicui.design.